Tutorial

DVD Video Standards

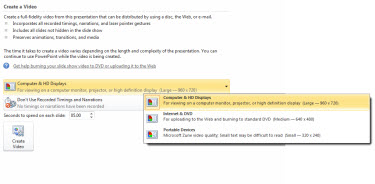
If you are exporting a presentation as a video for use on a DVD, what setting should be used? If this is for a consumer video player DVD use, go with PowerPoint’s highest quality (960x720px for a 4×3 aspect ratio) and let the DVD authoring software lower the resolution.

DVD compliant video has very specific requirements in order to be viewable on standalone DVD players.
• NTSC Video
• 720 x 480 resolution
• Audio type (Dolby AC3, PCM, MPEG) 48KHz sampling frequency
• 29.97fps frame rate
• Maximum bitrate of 9800 bps

Note 1: DVD authoring software (TLC Creative Services uses Sony Vegas Pro + DVD Architect) will transcode the PPT video and set these specs.

Note 2: High Def Blu Ray DVD’s can use different specs.

– Troy @ TLC

By |2016-08-16T09:20:35-07:00July 18th, 2012|Tutorial|

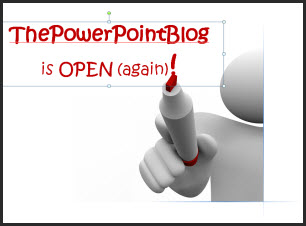
Creating the “Open Again” Image in PPT

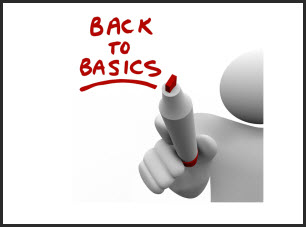
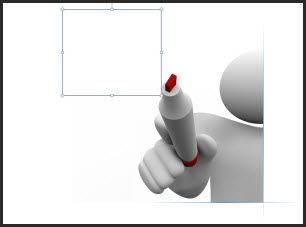
Yesterday’s post used a fun image that was downloaded from Fotolia.com and completely customized in PowerPoint. Here is what I did:

1. Research and download image from Fotolia.com (where TLC Creative Services has a subscription plan), then insert on slide.

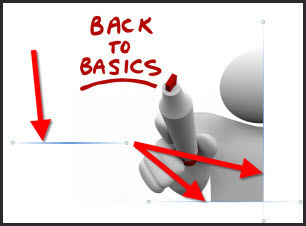
2. Frame the right and bottom of the image with gradient lines.

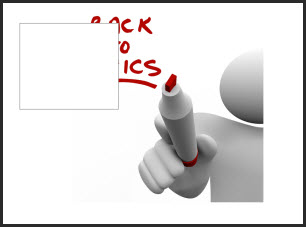
3. Add a white box (white to match the slide background color).

4. Size and position the white box to cover the existing text.

5. Add PPT text with the new message using a custom font, same fill color as the marker in the image and positioned right over the marker.

6. Done – no Photoshop needed.

– Troy @ TLC

By |2016-08-16T09:23:07-07:00July 2nd, 2012|Tutorial|

Add Slides to a Presentation and Keep Their Original Look

Adding slides from one presentation into another and hoping for a button that will automatically format the slides the way needed is just not a feature in PowerPoint. But, the almost magical “Destination vs. Source Formatting” button does exist. For this tutorial, we are going to add slides from the “Blue” presentation (Presentation #1) to the “Purple” presentation (Presentation #2) and keep the blue slides blue (ie. opposite of the last tutorial where the slides updated to the purple template).

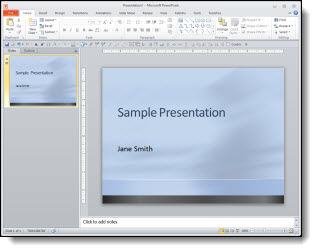
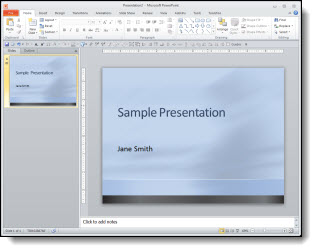
Here is our “Blue” presentation (#1):

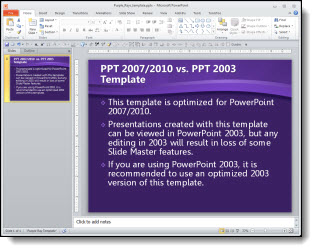
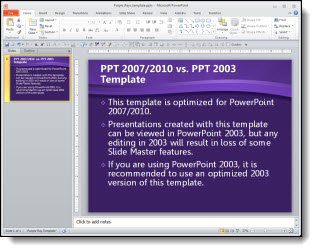
And here is our “Purple” presentation (#2):

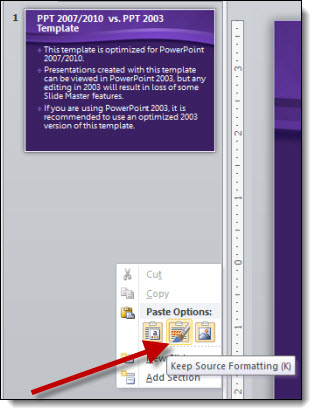
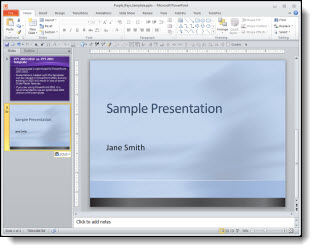
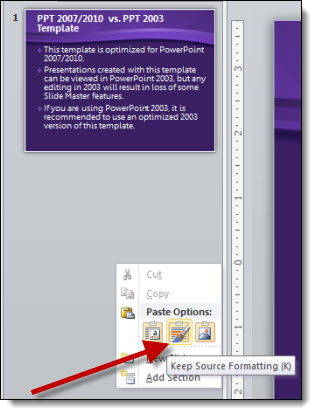
Select the slides from Presentation #1 and copy. Then paste them into Presentation #2. To paste in the new slides, right-click and in the pop-up menu in the “Paste Options” sections, select “KEEP SOURCE FORMATTING:”

With the KEEP SOURCE FORMATTING option the template for the new slides keeps the template that was used in Presentation #1. So the blue slides stay blue.

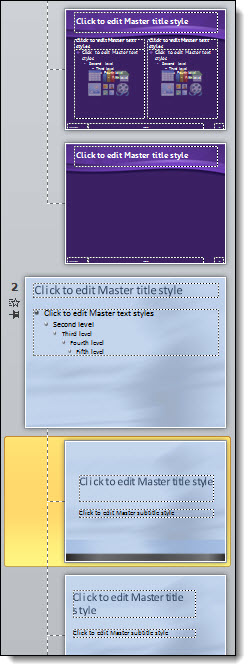
Behind the scenes what happens is a new Master Slide set is added to the presentation. So if you look in the slide layouts (HOME >> SLIDES section >> LAYOUTS) there are two master slide sets to choose from (Presentation #1 and Presentation #2).

NOTE: If you paste in more slides from the Blue presentation in a new location and select KEEP SOURCE FORMATTING another blue master slide set will be added (which is not optimal).

– Troy @ TLC

By |2016-08-16T09:25:02-07:00April 8th, 2012|Tutorial|

Add Slides to a Presentation That Fit In

Adding slides from one presentation into another and hoping for a button that will automatically format the slides the way needed is just not a feature in PowerPoint. But, the almost magical “Destination vs. Source Formatting” button does exist. For this tutorial, we are going to add slides from the “Blue” presentation (Presentation #1) to the “Purple” presentation (Presentation #2) and make all of the slides the same, so they are all purple.

Here is our “blue” presentation (#1):

And here is our “purple” presentation (#2):

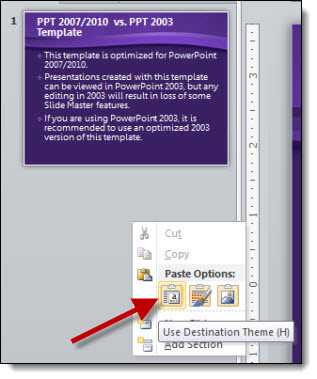
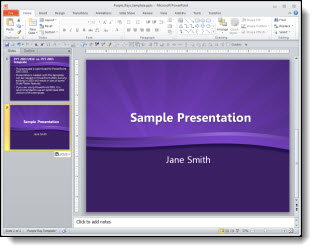
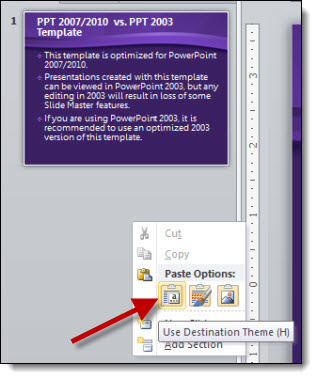
Select the slides from Presentation #1 and copy. The paste them into Presentation #2. To paste in the new slides, right-click and in the pop-up menu in the “Paste Options” sections select “Use Destination Theme:”

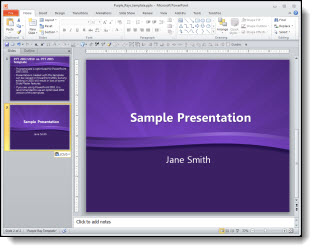
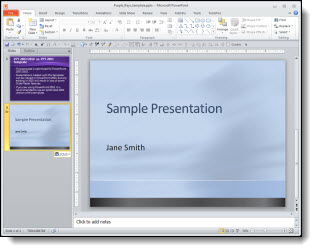
With the USE DESTINATION THEME option, the template for the new slides is assigned to the template used on the slide in front of the insert point. So now all of the blue slides are changed to the purple template.

*Note: There is no “magic” button and with this example the text boxes, background, colors used, etc. were all setup correctly using the template formatting (which also means it is a real template). When updating to the new (purple) template all of the master slide formatting carries over just fine. But there are lots of times when things are not based on template formatting and need to be manually updated (ie. no magic format button).

– Troy @ TLC

By |2016-08-16T09:25:27-07:00April 6th, 2012|Tutorial|

Why Are The Shadows Not Animating?

Have you run into the issue of during the slide show an animated bullet list of text has the text shadow visible and then the full text animates on top of the shadow? It is a scenario that started with PPT 2007. The good news is, it is not a bug in the program and it is easy to “fix.”

Scenario:
You have shadow effects on your text and a great on-click animation.

But when you view as a slide show, the shadow of the text is not animating!

To Fix:
1. Select the text box.

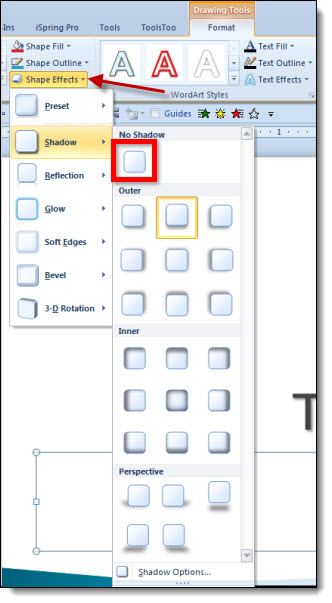
2. Go to FORMAT >> SHAPE EFFECTS >> SHADOW and change the selection to NO SHADOW.

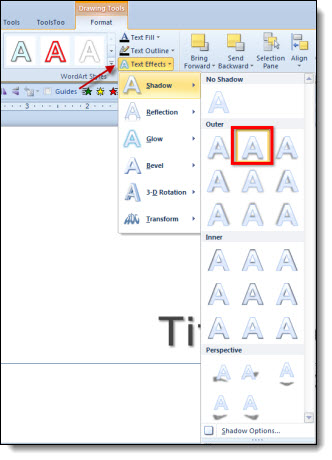
3. With the text box still selected, go to FORMAT >> TEXT EFFECTS >> SHADOW and choose the shadow style needed.

4. Now when you run as a slide show everything appears when animated!

Why:
PowerPoint has always had two types of shadows: Shape and Text shadows. In PPT 2003, there was really no visual difference between them (at the code level, the two shadow types were different). Starting with PPT 2007, the difference between the two shadows types made a difference in how things are displayed. The non-animating text shadow is the most common way this shows up.

– Troy @ TLC

By |2016-08-16T09:26:21-07:00April 2nd, 2012|Tutorial|

Use Background Fill For Great Graphic Elements

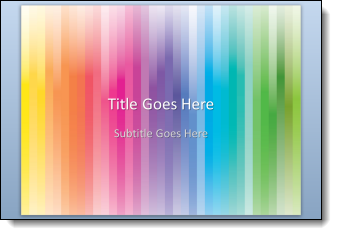
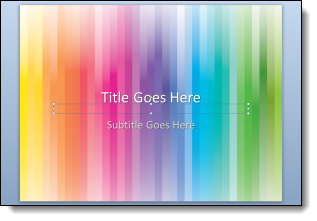
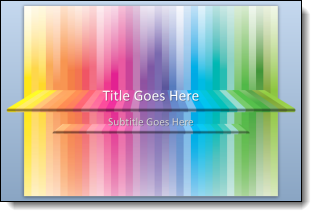
I have used this technique on some recent projects that we designed dynamic background art for. The idea uses a simple feature that is used little and creates really dynamic graphic elements that are amazingly easy to use. Here is my sample slide with a dynamic background (thanks to Amber for creating this sample slide and tutorial images).

1. Add a PPT shape of your choice, I am using a standard rectangle. Set it as the background (FORMAT >> BACKGROUND >> PICTURE).

2. Set the PPT shape to “No outline,” solid color fill and no styling.

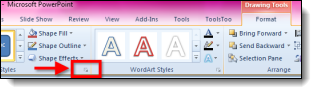
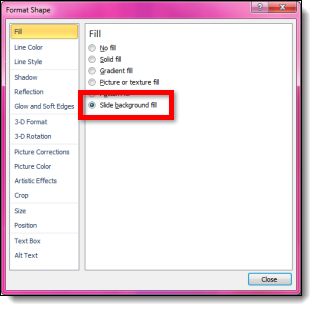
3. With the shape selected, go to FORMAT >> open the shape options by clicking the small icon in lower right >> under FILL >> SLIDE BACKGROUND FILL (last option).

4. NOTE: The shape has now disappeared with only the shape selection lines visible.

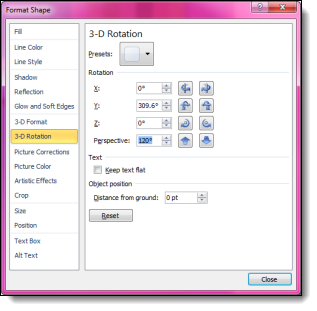
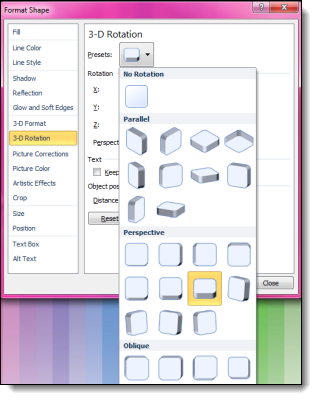
5. What you do here determines the look you create. I am using 3D perspective and some styling options. Select the shape.
– Add 3D Rotation (we are starting the “Perspective Relaxed” preset).

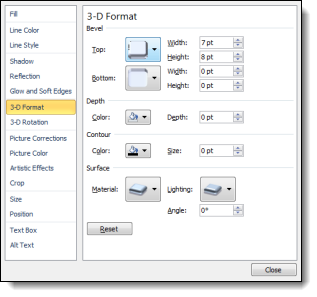
– Add a 3D Format for a bevel effect (Circle bevel with the width at 7pt and height at 8pt).

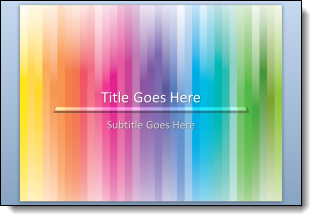
6. Now we see the interesting effect when the background fill is combined with some shape styling.

7. To really create a dynamic visual the next step is to select the shape and modify the 3-D Rotation perspective to 120 degrees.

8. With the new 3D formatting we can really see the effect of the background fill in the shape.

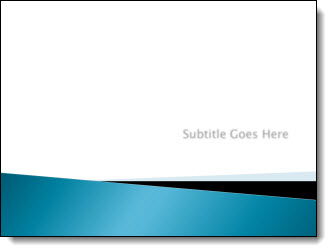
9. To create a full Title Slide layout, the shape was enlarged for more depth and stretched across the slide. Then duplicated, reduced in size and moved under the subtitle text box. The background fill automatically adjusts to the new placement on the background to create new looks for the same shape

Click here to download the sample slide.

– Troy @ TLC

By |2016-08-16T09:29:58-07:00March 20th, 2012|Tutorial|

Show/Hide the Ribbon in PPT 2010

The ribbon, introduced in Office 2007, is a compact layout. But there are times when having a bit larger work area is helpful. For those times, starting with PPT 2010, the ribbon can be hidden to increase the work area.

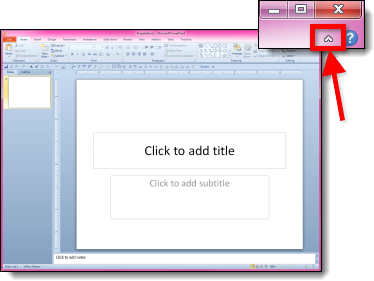
Here is the standard edit view with the ribbon. In the upper right corner is a small up/down icon:

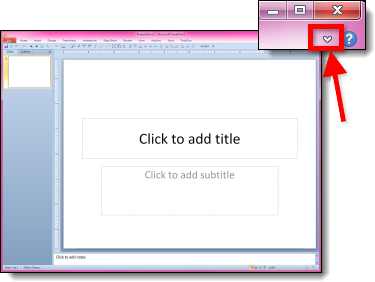
Click the up/down icon and it hides or shows the ribbon:

– Troy @ TLC

By |2016-08-16T09:30:26-07:00March 18th, 2012|Tutorial|

Using Windows 7 Keyboard Shortcuts to Move A Presentation

Windows 7 is installed on all computers here at TLC Creative Services for good reason – it is the best operating system Microsoft has released. If you are not familiar with moving and arranging application windows using keyboard shortcuts in Windows 7, it is a great feature!

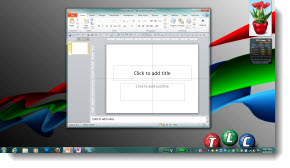
Here is my desktop with PowerPoint open as a small application window:

If I used the Windows Key + Up arrow

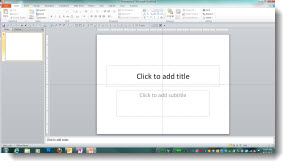
PowerPoint maximizes to full screen:

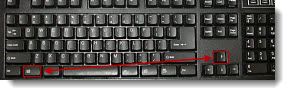
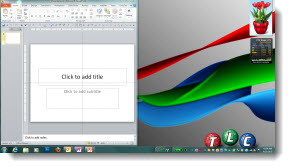
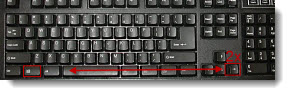
Use the Windows key + Left arrow to snap PowerPoint to the left side:

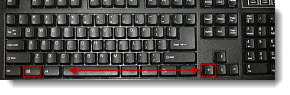
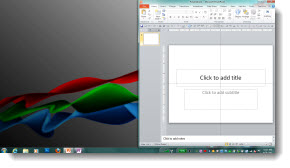
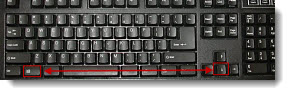
Use the Windows key + Right arrow to snap PowerPoint to the right side:

And use the Windows key + Down arrow to minimize PowerPoint:

Plus, if you have multiple monitors this also moves the application to the other monitors! Use Window Key + Left/Right arrow to “step” the application across the screens. Or use Window key + Shift + Left/Right arrow to quickly move the application to the other monitor keeping the same size and position when it moves.

Give it a try, I am certain this is a Windows 7 feature you will make a part of your daily design routine like I have.

– Troy @ TLC
By |2016-08-16T09:37:57-07:00January 17th, 2012|Tutorial|

Theme or Source – Your Choice

When moving slides from one presentation to another, the slide formatting (based on the master slides) is your choice – if you use the Paste Dialog.

1. From any presentation, copy the slides either in the left pane or slide sorter.

2. Go to the presentation where the slides are to be added and paste them in.

3. To paste, click where new slides are to be added and right-click. From the pop-up dialog, under “Paste Options” select “Use Destination Theme.”

4. The pasted slides will take on the formatting from the master slide set in the presentation:

5. Or you can choose “Keep Source Formatting:”

6. With “Source Formatting” the new slides retain their orginal master slide and formatting:

The choice is yours!

– Troy @ TLC
By |2016-08-16T09:39:54-07:00January 8th, 2012|Tutorial|
Go to Top