Tutorial

Who is Watson and Why is He Important to Microsoft?

In this case Dr. Watson is a debugger for Microsoft, not Sherlock Holmes assistant.

If Dr. Watson is running and a Windows application crashes, such as PowerPoint, it creates a report with technical information that Microsoft developers use to determine what caused the crash. The key is sending the data, which I have been promised is anonymous, to Microsoft.

After spending a few days with the PowerPoint developers at Microsoft last week, like it or not, Watson reports play a HUGE factor in what gets fixed, or updated. So submit those Watson reports whenever possible – they make a difference.

– Troy @ TLC

By |2016-09-16T10:52:51-07:00March 12th, 2009|PowerPoint, Tutorial|

Instantly Select The Box – Not The Text

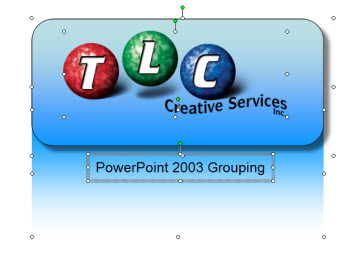
With text boxes, or autoshapes with text in them, there are two types of selection:
1. Selecting the text so it can be edited.
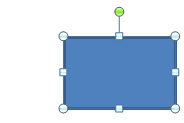
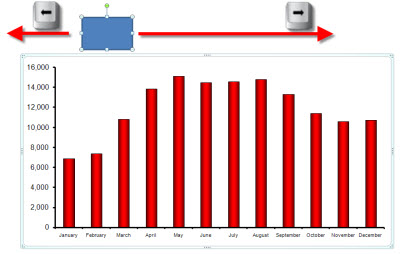
2. Selecting the shape so it can be edited or moved.

Selecting the text is easy, just click inside the box near the text and you get the text cursor. Note, when you have text selected the shape has a dotted line border.

But to select the shape I see people struggle all the time. The three common ways are:
1. Select the text, then carefully click on the dotted line border to change the selection to the shape.
2. Carefully position mouse at edge of shape and click (same as #1, but skipping the text selection – usually).
3. Select the text, then press the ESCape key to change the selection to the shape (this is a great trick if you are unfamiliar with it).

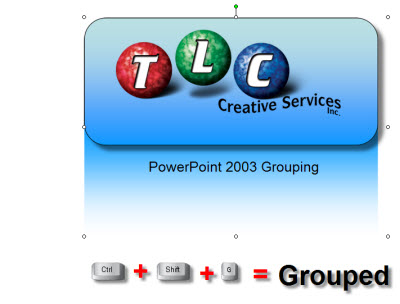
But the 4th, and often best, way to select a shape and not the text is also the easiest.
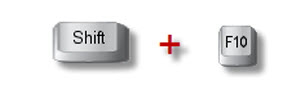
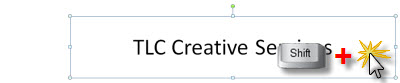
4. Hold the shift key and click on the shape – anywhere. This only allows the shape to be selected, never the text.

Note: the border is a solid line when the shape is selected.

– Troy @ TLC

By |2016-09-16T10:54:15-07:00March 10th, 2009|Tutorial|

SmartArt Balancing Act

SmartArt really makes you look – smart! But did you know the Balance graphic is smart enough to adjust itself…?

Go to INSERT >> SMARTART >> RELATIONSHIP >> BALANCE

Like all SmartArt the graphic is actually controlled by a standard bulleted list.

Here is my sample Balance SmartArt graphic. It has two categories, one for each side. And it starts off with equal balance – 1 bullet point per side.

But if you add more bullets to one side, the scale automatically ‘tips’ to the heavier side! Here I have added a second bullet to Category 1 and tipped the scale.

Note: only primary bullets affect the balance. Adding sub-bullets is fine, but they have no impact on which way the balance beam leans.

– Troy @ TLC

By |2016-09-16T10:55:15-07:00March 8th, 2009|Tutorial|

Resize Preview To Fit-to-Screen: PPT vs. Photoshop

To quickly get the “big picture” you may need to see the whole slide or image. There are some great keyboard shortcuts to do this, but they are different in PPT 2003, PPT 2007 and Photoshop.

PowerPoint 2003:
Option 1: Use the drop-down menu and choose FIT

Option 2: Install the PPTools free StarterSet and click the magnifying glass icon

PowerPoint 2007
Click the ‘Fit to Window’ button in the lower right corner

Photoshop:
CTRL + 0 (zero)

– Troy @ TLC

By |2016-09-16T11:09:46-07:00January 27th, 2009|Tutorial|

Resize and Keep Aspect Ratio: PPT vs. Photoshop

Another great feature is resizing (enlarging or shrinking) images and autoshapes from any corner and have it maintain the same aspect ratio.

This feature is available in PowerPoint and Photoshop, using the SAME key combination.

PowerPoint: SHIFT + adjust with mouse

Photoshop: SHIFT + adjust with mouse

– Troy @ TLC

By |2016-09-16T11:10:07-07:00January 25th, 2009|Tutorial|

Resize From Center: PPT vs. Photoshop

A great feature is resizing (enlarging or shrinking) images and autoshapes from their center point.

This feature is available in PowerPoint and Photoshop, but using different key combinations.

PowerPoint: CTRL + SHIFT + adjust with mouse

Photoshop: CTRL + ALT + adjust with mouse

– Troy @ TLC

By |2016-09-16T11:10:30-07:00January 23rd, 2009|Tutorial|

Change Photoshop Ruler Measurement

I have been using Photoshop since version 2 (the dark ages of computer design) and just had Lori point out a cool feature I never knew existed!

I know PowerPoint is our topic, but I work in Photoshop virtually everyday preparing images for templates and presentations. In this case I was moving back and forth between PPT images that are measured in pixels and a print layout that was measured in inches. So, I was constantly going into the preferences and changing the rulers until Lori came over and pointed out a better way.

If you RIGHT-CLICK the ruler in Photoshop, it can instantly (and easily) be changed!

– Troy @ TLC

By |2016-09-16T11:10:49-07:00January 21st, 2009|Tutorial|

“Just Rename It To .PPSX”… (doesn’t work)

In the old days (PPT 95 through 2003), the only difference between a presentation and a show was the extension. So if you had a presentation and wanted it to open in slideshow view, just the file extension had to be renamed. But in the new world (now 2 years old) of PPT 2007 that does not work.

1. Here is our test file – a .pptx (PPT 2007 presentation)

2. Manually change the file extension (.pptx), changing the “T” to an “S”, and Windows gives this confirmation dialog

3. The icon changes to the PowerPoint Show icon and the extension is .ppsx

4. But when you try to open the file you get this error

5. Why? Because any Office 2007 file with an “x” in the file extension is really a .zip file with lots of individual files inside it. Changing the extension does not directly change the file any longer, so the quick fix of ‘just rename it’ no longer works…

– Troy @ TLC

By |2016-09-16T11:11:15-07:00January 19th, 2009|Tutorial|

Group to Adjust Line Length in PPT 07

Okay so the ‘little’ bug in PPT 2007 is driving you crazy! The fix is on the way with SP2 for Office 2007 (really), but you need to adjust the length of your straight lines today.

Here is a PPT 07 line

To adjust length AND maintain same angle you hold down the SHIFT KEY + CLICK on end of line and it zooms out to infinity

One solution is to duplicate the line, group the 2 lines together, then adjust the length of the group

The original line stays in the same position, the length was adjusted, the angle was maintained! Now ungroup and delete the duplicate line leaving you with the adjusted line (made shorter in this example)

– Troy @ TLC

By |2016-11-17T12:03:05-08:00January 15th, 2009|Tutorial|

YouTube Video In PowerPoint (part 2)

Here is my process for adding a YouTube (google, metacafe, soapbox, etc) video to a PowerPoint presentation:

1. Find the movie online and copy the URL

2. Go to www.techcrunch.com/get-youtube-movie

3. Paste in the YouTube URL

4. Follow instructions to download to your computer.
Note: the video is in .flv format, which need to be converted for use in PowerPoint

5. Go to www.media-convert.com

6. Be sure you are in the ‘Local File Conversion’ tab

7: Click the BROWSE button and find the video on your computer

8: Convert the .FLV video to a PowerPoint friendly .WMV format.
Note: there are lots of options, but I recomend
– No Video Preset
– Windows Media Video (.wmv)

9: Click OK and following instructions to convert and have file emailed you.

10: Move newly created .wmv video to same folder as presenation and use PowerPoint’s INSERT >> MOVIE FROM FILE wizard

11: Done!

– Troy @ TLC

By |2016-11-17T12:12:13-08:00December 28th, 2008|Tutorial|
Go to Top