Picture Effects in PowerPoint’s New AI Powered Edit Picture
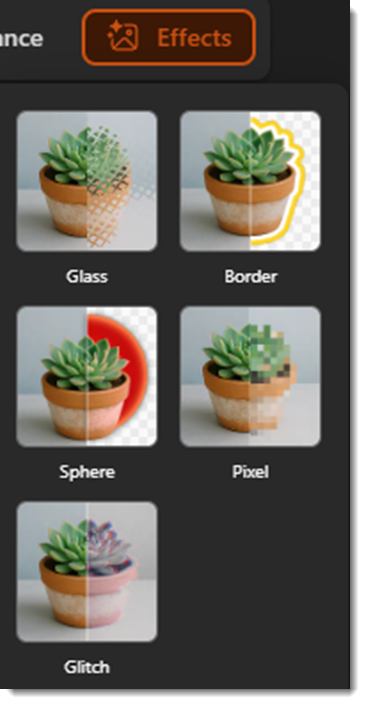
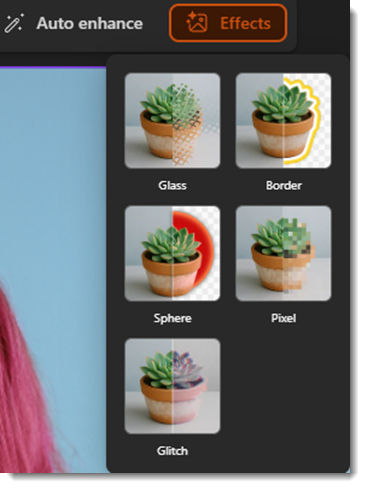
In our last post, we looked at how PowerPoint’s new AI powered Photo Editor can help fix a photo with a variety of tools. This time, we’ll cover the last photo editor tool in the tool bar, which is called “Effects.” These are styling effects, and currently, there are 5 different picture effects:
- Glass
- Border
- Sphere
- Pixel
- Glitch
To get to this menu, you simply click the Picture Format tab and then click Edit Picture to pull up the interface. Now, we can start editing pictures!
You will see the effects tab all the way to the right. Clicking this will bring up the menu with those 5 picture effects.
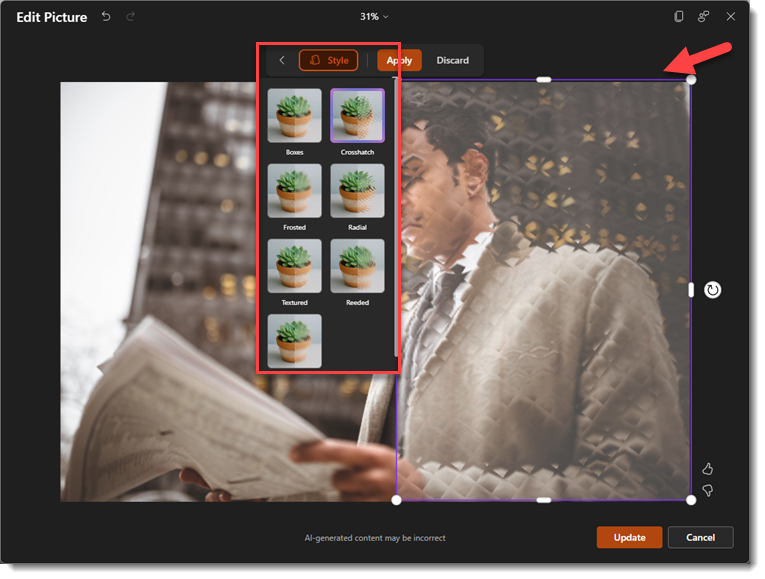
Glass creates a sort of frosted glass effect on your picture, and you can adjust how much of the picture uses the effect, and also change the style of the glass texture.
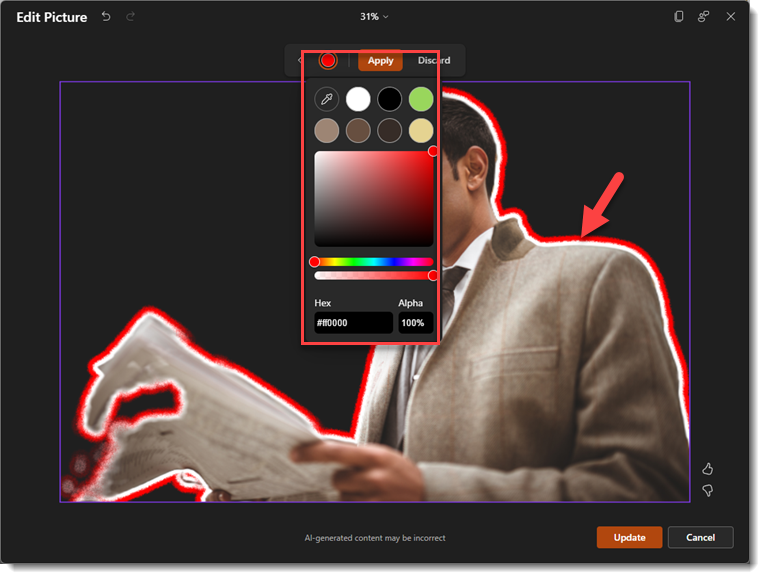
Border removes the background of the image, and then applies 2 borders to the image, an inner white border, and then another border that can be any color of your choosing.
Sphere is sort of a unique effect, like Border, it removes the background, but this one adds a glowing sphere in the background, and subtle highlights to the subject that match whichever color you choose.

Pixel simply applies a pixelization effect to your photo, and you can adjust the area being affected, as well as the intensity of the pixels. The left side of the slider will create smaller pixels, while sliding it to the right will create larger pixels.
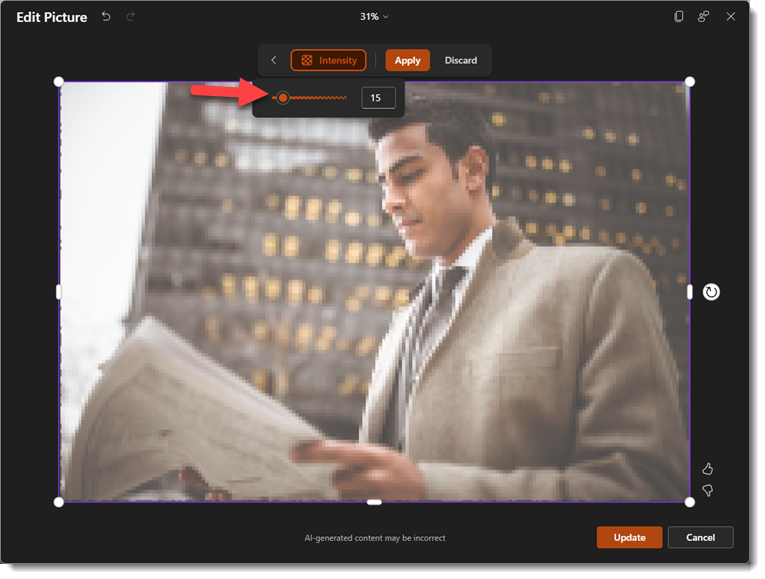
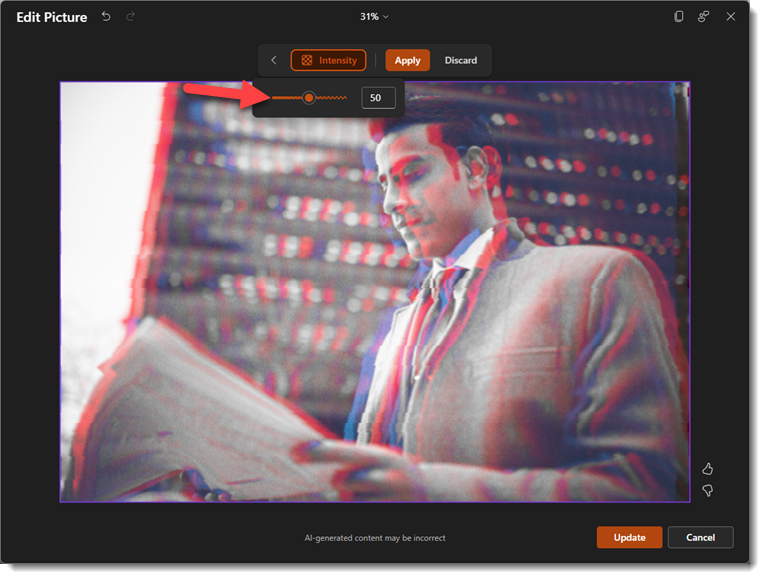
Glitch is a pretty cool effect that applies a glitchy look to the photo, and once again, this one has an intensity slider to adjust how pronounced the effect is.
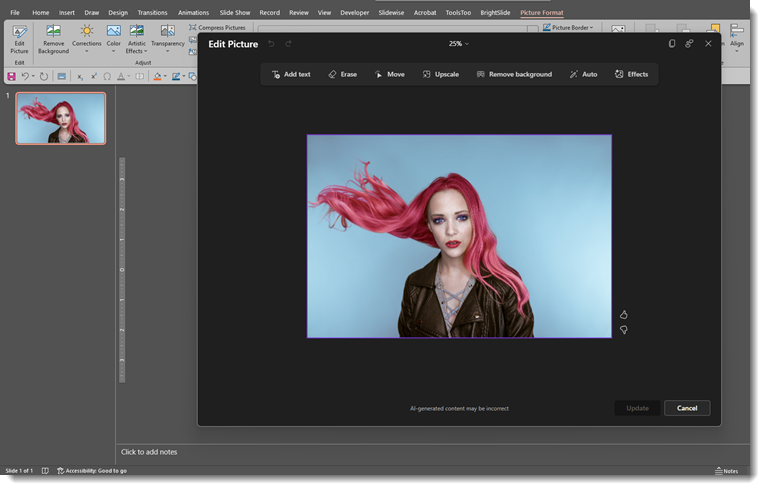
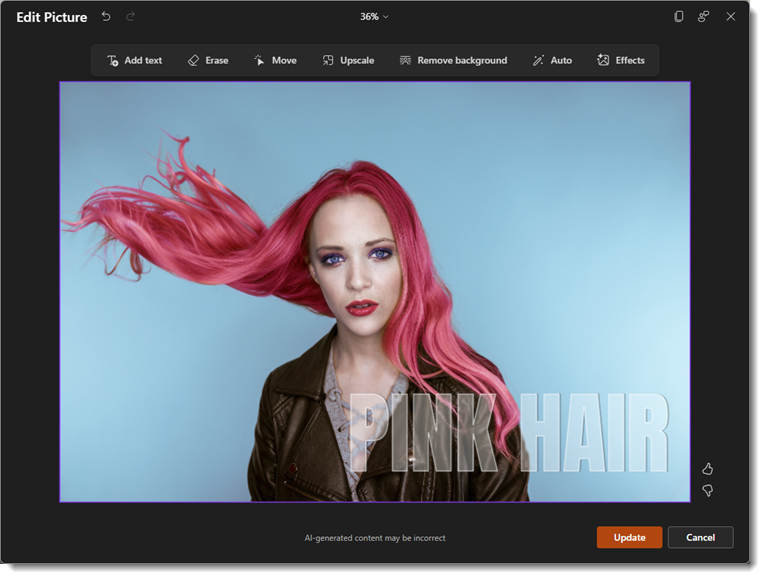
The picture effects panel in the new Image Editor is a bit limited, but it can help make images more interesting, and you can even combine tools to push the image even further. Here’s an example using the background remover tool, glitch effect, and text effects all in one:

The new AI Image Editor toolbox in PowerPoint has introduced some genuinely useful creative tools right out of the box. While it won’t replace professional photo editing software (e.g. Photoshop, Figma, Affinity, etc.) for heavy lifting, it’s perfect for giving your slides a modern edge without the hassle of switching apps. It will be interesting to see where Microsoft takes this in the future, but for now, it’s a solid upgrade to our daily workflow!
-The TLC Creative Services design team
PowerPoint’s New AI Powered Edit Picture
We’ve all been there. You’re building a PowerPoint deck, and you find a GREAT image to complement the talking point… but it’s not quite perfect. Maybe there’s a random stranger walking through the background of your team photo. Or perhaps the image could use a touch-up to make it pop more. In the past, stopping for edits like this meant pausing your workflow entirely to head over to your photo editing app of choice.
If you have Adobe Creative Cloud, this means launching Photoshop and opening the same image separately and then proceeding with the editing yourself. Time-consuming tasks such as removing a background or adjusting the brightness, contrast, etc., are certainly a friction point that forces you out of your presentation mindset.
But with this new update, Microsoft has just changed that workflow! Powerful AI photo editor tools are now baked directly into PowerPoint’s ribbon. You get decent editing capabilities without ever having to leave the PowerPoint application.
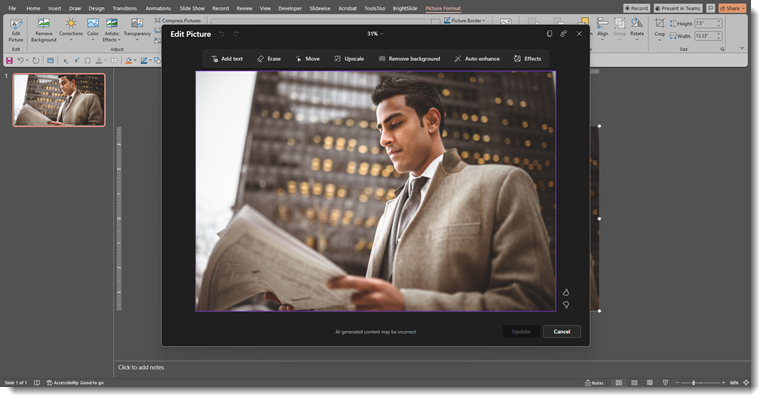
Here is a high-level look at the new “Edit Picture” interface and what these tools can do. And before you read any further, no, the new Edit Picture tool does not have the ability to expand the background of a photo. ☹️
Accessing the new editor is in a slightly different spot on the Picture Format tab. Once you insert a photo (for this example, we just used Microsoft’s stock library), click the Picture Format tab and then select “Edit Picture” way over there on the left:

This will open up the new interface as PowerPoint shifts into a focused photo editor mode, with a dedicated AI toolbar at the top.
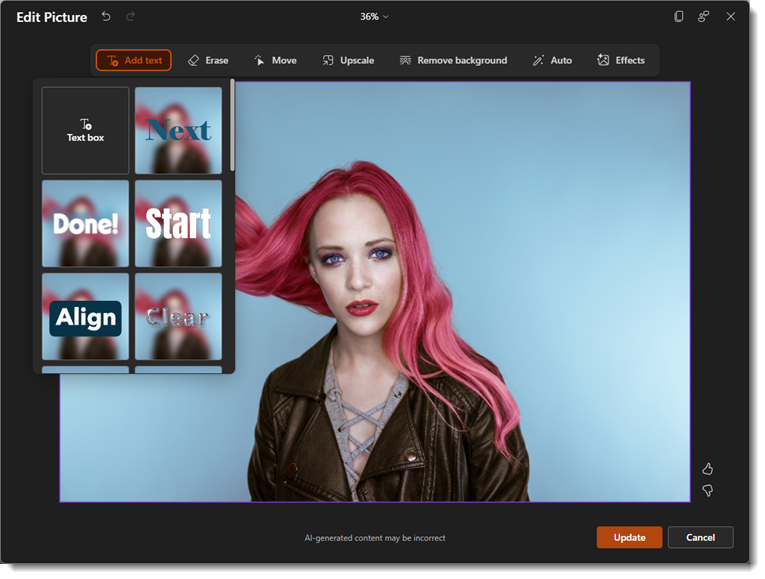
We’ll walk through a few of the editing options starting with Add Text: This will add custom text with a variety of different effects.
Erase: You can use a quick selection or manually brush an area of the photo you’d like to erase. This isn’t the best example of a photo to use for this tool, but here’s a look:

Move: This feature allows you to select a part of the image using the same auto selection or brush tool and then move that to another part of the image area (great for adding space for copy!)

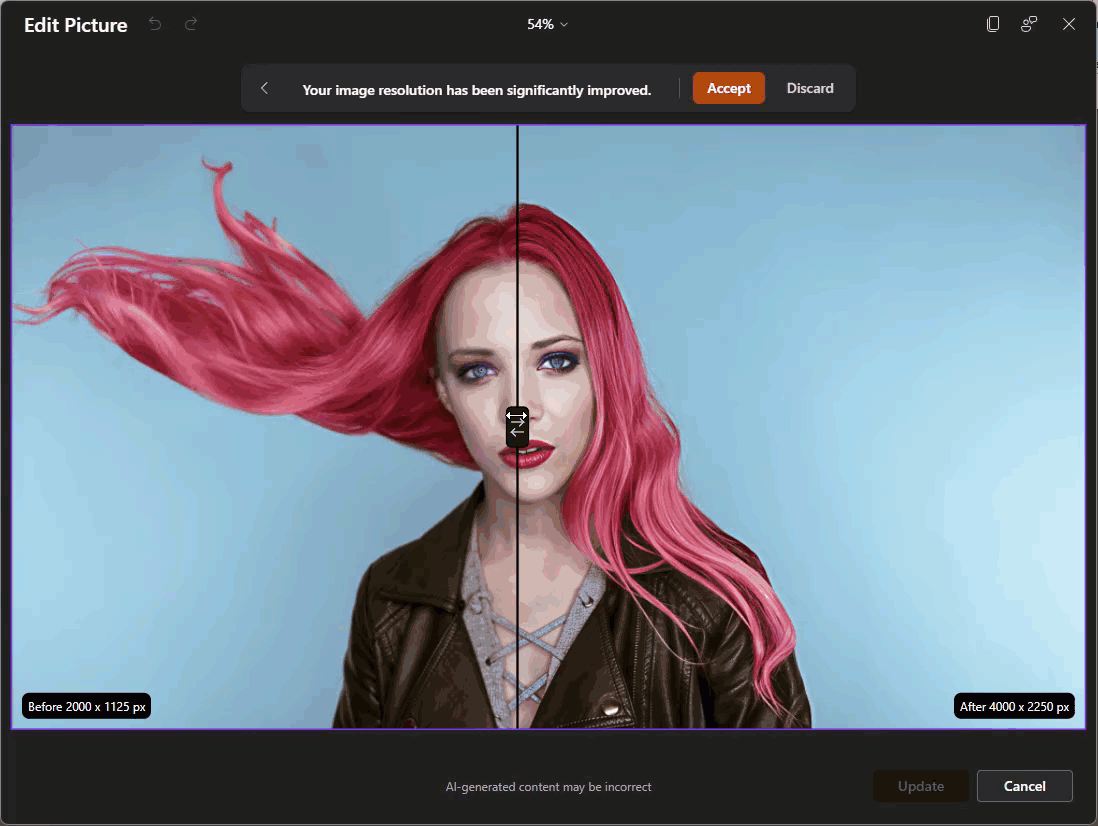
Upscale: Using this feature requires a fairly low-resolution image (most stock images, including the library within PowerPoint, are already very high resolution). For the sake of this walkthrough, I’ve downsized the resolution of our sample image here so that the upscale feature can be used. The photo editor will use AI to upscale the image to a higher resolution with no pixelation. You’ll notice it shows you a “before and after” slider so that you can see the changes:
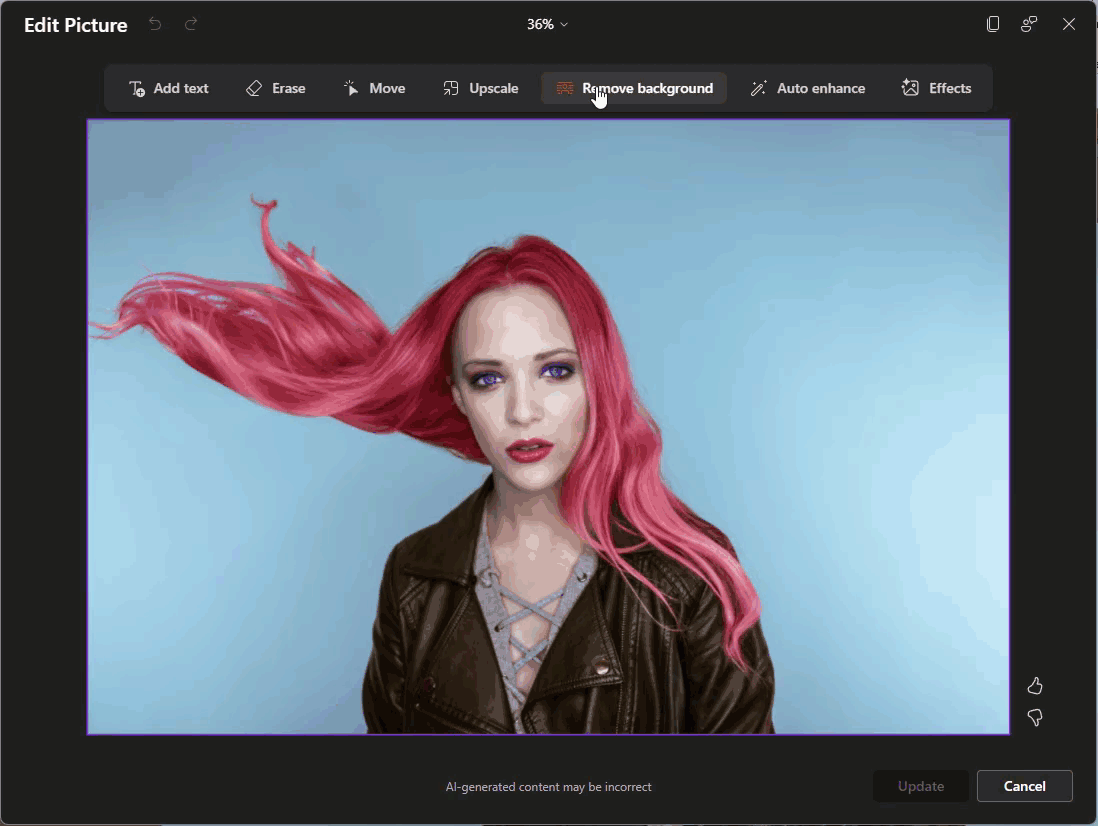
Remove Background: This will auto-select the background and remove it, like the old Remove Background feature that’s been in PowerPoint for quite some time, but AI-powered (and a lot less clunky).
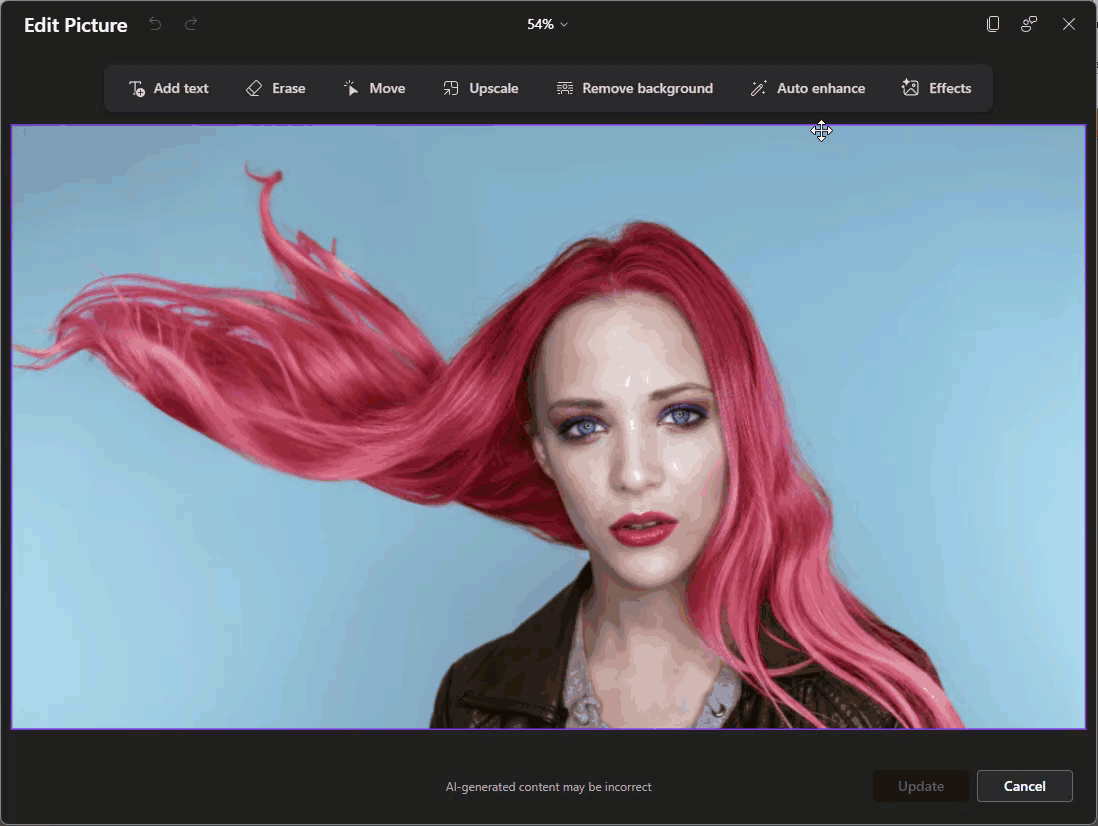
Auto Enhance: Using this will do an automatic photo touch-up. However, for better or worse, there are no customization settings, just one click, and it’ll enhance the image. This feature also uses the before and after slider so that you can see what was changed.
Effects: These are special effects that we’ll be going into more detail in a future blog post.
Now you might be thinking this is all powered by Microsoft’s flagship AI, Copilot. Technically, it’s not. While Copilot acts more as a “Project Manager” within the Office ecosystem, the Edit Picture feature is actually a two-part system:
- Computer Vision: To “see” the image and separate the subject from the background – this is part of the larger Microsoft Azure toolbox.
- Generative AI (DALL-E 3): To draw new pixels when you erase or move objects.
Ultimately, this update isn’t just about cool AI photo editing tricks. You can think of it more as maintaining your workflow momentum. Every time you must minimize PowerPoint to open another app, it can make you lose focus. By bringing these image editor tools directly into the ribbon makes it easier to stay in the flow. Of course, these tools won’t replace the touch of a professional graphic designer, but for quick image fixes and touch-ups, they can really help keep you in the zone.
-The TLC Creative Services design team
New Podcast Episode Available! “Behind the Curtain: A Day in the Life of a Presentation Designer”
New episode of The Presentation Podcast now available!
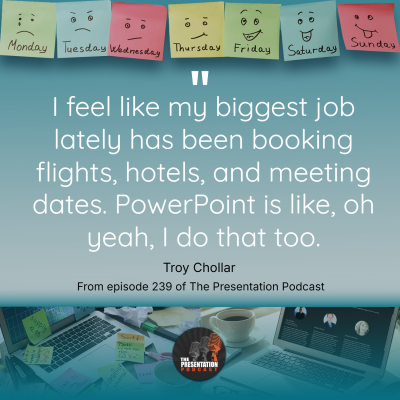
In episode 239 of The Presentation Podcast, hosts Troy, Sandy, and Nolan share a behind-the-scenes look at their daily lives as professional presentation designers. They talk about how a good amount of their work happens outside PowerPoint, from project management, client communication, travel logistics, and their go-to tech tools for not only presentation design, but running a design agency. Join our conversation for a closer look at the complexity and creativity involved in daily activities of presentation design!
Listen on your favorite podcast app, or at The Presentation Podcast site here.
The Take-Home Slide
At a recent conference, one presenter did something that immediately caught my attention – and apparently everyone else’s too! You know how most talks end with a “Take-Home” slide? It’s that tidy little 2-4 bullet point summary that tells you, “Here’s what you should remember, even if you forgot everything else.” It’s usually labeled something like Summary, Key Takeaways, or In Closing, and it usually shows up near the end of the slide deck – when everyone is already thinking about lunch.

But this presenter? They put the Take-Home slide as slide #2. Right after the title. No warm-up. No agenda slide. No rambling intro. Just – bam! – “Here’s what you’re going to walk away with.”
And honestly? The audience loved it.
Most presentations have an Agenda, Roadmap, Outline, Table of Contents, or Navigation slide to cover the structure of their talk. It’s familiar, it’s expected, and it gets the job done. But leading with a Take-Home slide does something a little different: it sets expectations, not just structure. Instead of saying, “Here’s what we’ll talk about,” it says, “Here’s what you’ll get from listening.”
It reframes the whole presentation from a content list to a value promise.
And that tiny shift, from outlining the journey to highlighting the destination, changes how the audience pays attention. They know exactly why it matters, right from the start.
Just another idea for the next presentation you are designing. 😊
-Troy and the TLC Creative Services Presentation Design Team
Hack PowerPoint Transitions for a Great Effect!
When using dynamic PowerPoint transitions there is a hack to giving the transition a custom middle color! For example, on this Reveal transition below, we see the slide background during the transition effect. It’s black or white by default, according to the Background Style of the master slide assigned. In this example the slide background is set to white, which is the mid-transition color we see.
![]()
However, there is a transition hack for PowerPoint’s dynamic transitions – the background color in the middle of the transition can be customized! To confirm, this is dependent on which transition is in use, and it will not work with all transitions (see transition types below).
For example, the Reveal transition above uses the CURRENT slide background color, which is white, as part of the transition. By default, this is the Background Style assigned to that Master slide (almost always white or black).
TIP: Use caution when changing Background Styles! Changing a Background Style has a lot of tangent updates that can change slide content.
SET THE SLIDE BACKGROUND COLOR
![]()
For example, create 2 slides, and set the first slide to a blue background and the second slide to an orange background. This must be the true slide background setting – it will not work if you add a blue or orange box to the slide – the background must be set via Format Background > Solid Color.
To set the slide background color, click on the Design tab and then the Format Background button to the right of the toolbar (or simply right-click off the slide and select Format Background).
![]()
![]()
With the SOLID FILL button selected, click on COLOR to change to blue for the first slide and orange for the second slide of the presentation.
![]()
Now the Reveal transition has a subtle fade from blue to orange, which is like getting a bonus, custom visual effect!
However, the slide backgrounds are only going to be seen during the transition effect. To demonstrate this, let’s add our full slide images from the first example to our blue and orange slides (an image on each slide that “covers” the assigned color background).
![]()
The result: instead of the slides flashing to white during the transition, there is now a blue-to-orange color shift during the slide transition!
![]()
MORE OPTIONS
In addition to setting the background with a solid color, other options are supported, like gradients, and image backgrounds – if they are true embedded background images set in the Format Background dialog.
As an example, here the same Reveal transition is used. In the first slide, the background is the default black background. The second slide has a background image of colorful glitter. The Reveal transition adds the colorful glitter image as part of the transition!
![]()
THIS DOES NOT WORK EVERYWHERE
Unfortunately, this transition hack doesn’t work on all transitions. Transitions indicated below with a (✓) use the slide background color as part of the transition effect, and the color can be modified as we described above. The transitions, noted with an (x) use a black between color – that cannot be changed. And the transitions without a symbol do not have a “between color” for the transition.
![]()
Enjoy these PowerPoint transition hacks to further customize your presentations!
-The TLC Creative Services design team
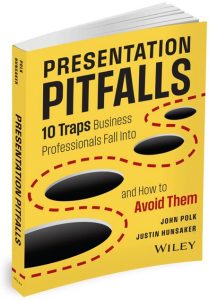
Presentation Resource List (from Presentation Pitfalls)
I recently read “Presentation Pitfalls” by John Polk and Justin Hunsaker. In addition to the superb presentation design content and slide design rational, it includes a very thorough resource section at the end. Three full pages of books and podcasts. Get the book – it is a great presentation resource! The compiled list is also a great resource. For online reference, here is the presentation resources listed:
Presentation Design
- Altman, Rick. Why Most PowerPoint Presentations Suck and How You Can Make Them Better. Pleasanton, CA: Harvest Books, 2012.
- Duarte, Nancy. Slide:ology: The Art and Science of Creating Great Presentations. Sebastopol, CA: O’Reilly Media, 2008.
- Haims, Nolan. The Better Deck Deck.
- Malamed, Connie. Visual Design Solutions: Principles and Creative Inspiration for Learning Professionals. Hoboken, NJ: Wiley, 2015.
- Minto, Barbara. The Minto Pyramid Principle: Logic in Writing, Thinking, and Problem Solving. London: Minto International, 1996.
- Reynolds, Garr. Presentation Zen: Simple Ideas on Presentation Design and Delivery. Berkeley, CA: New Riders, 2008.
- Simon, Carmen. Impossible to Ignore: Creating Memorable Content to Influence Decisions. New York: McGraw-Hill, 2016.
- Simon, Carmen. Made You Look: How to Use Brain Science to Attract Attention and Persuade Others. New York: Random House, 2020.
Storytelling and Presentation Delivery
- Abrahams, Matt. Think Faster, Talk Smarter: How to Speak Successfully When You’re Put on the Spot. New York: Simon Element, 2023.
- Chen, John. Engaging Virtual Meetings: Openers, Games, and Activities for Communication, Morale, and Trust. Hoboken, NJ: Wiley, 2020.
- Duarte, Nancy, and Patti Sanchez. Illuminate: Ignite Change Through Speeches, Stories, Ceremonies, and Symbols. New York: Portfolio, 2016.
- Gibson, Glenn. Before the Mic: How to Compose Meaningful, Memorable, and Motivational Presentations. Victoria, BC: Self-published, 2019.
- Halpern, Belle Linda, and Kathy Lubar. Leadership Presence: Dramatic Techniques to Reach Out, Motivate, and Inspire. New York: Gotham Books, 2004.
- Heath, Chip, and Dan Heath. Made to Stick: Why Some Ideas Survive and Others Die. New York: Random House, 2007.
- Pollard, Tim. The Compelling Communicator: Mastering the Art and Science of Exceptional Presentation Design. Lafayette, CO: Oratium, 2016.
- Whittaker, James. The Storyteller’s Spellbook: How to Make Your Ideas More Compelling and Your Career More Magical. Self-published, 2017. Kindle edition.
- Zimney, Sally. Speaking Story: Using the Magic of Storytelling to Make Your Mark, Pitch Your Ideas, and Ignite Meaningful Change. Minneapolis, MN: Two Harbors Press, 2017.
Data Visualization
- Berinato, Scott. Good Charts: The HBR Guide to Making Smarter, More Persuasive Data Visualizations. Boston: Harvard Business Review Press, 2016.
- Duarte, Nancy. DataStory: Explain Data and Inspire Action Through Story. Sebastopol, CA: O’Reilly Media, 2019.
- Evergreen, Stephanie D. H. Effective Data Visualization: The Right Chart for the Right Data. Thousand Oaks, CA: SAGE Publications, 2016.
- Few, Stephen. Show Me the Numbers: Designing Tables and Graphs to Enlighten. Burlingame, CA: Analytics Press, 2012.
- Knaflic, Cole Nussbaumer. Storytelling with Data: A Data Visualization Guide for Business Professionals. Hoboken, NJ: Wiley, 2015.
- Tufte, Edward R. Beautiful Evidence. Cheshire, CT: Graphics Press, 2006.
- Tufte, Edward R. The Visual Display of Quantitative Information. Cheshire, CT: Graphics Press, 1983.
- Wong, Dona. The Wall Street Journal Guide to Information Graphics: The Dos and Don’ts of Presenting Data, Facts, and Figures. New York: W. W. Norton & Company, 2010.
- Zelazny, Gene. Say It with Charts: The Executive’s Guide to Visual Communication. New York: McGraw-Hill, 2001.
Tool Usage
- Bossé, Chantal. Microsoft PowerPoint Best Practices, Tips, and Techniques: An Indispensable Guide to Mastering PowerPoint’s Advanced Tools to Create Engaging Presentations. Birmingham, UK: Packt Publishing, 2023.
- Hogan, Stephy. The Reluctant Designer’s Field Guide to PowerPoint. Self-published, 2022.
- Parkinson, Mike. A Trainer’s Guide to PowerPoint: Best Practices for Master Presenters. Alexandria, VA: ATD Press, 2018.
- Terberg, Julie, and Echo Swinford. Building PowerPoint Templates v2. Self-published, 2021.
Communication Adjacent
- The Arbinger Institute. Leadership and Self-Deception: Getting Out of the Box. San Francisco: Berrett-Koehler, 2000.
- Covey, Stephen M. R. The Speed of Trust: The One Thing That Changes Everything. New York: Free Press, 2006.
- Duhigg, Charles. The Power of Habit: Why We Do What We Do in Life and Business. New York: Random House, 2012.
- Kahneman, Daniel. Thinking, Fast and Slow. New York: Farrar, Straus and Giroux, 2011.
- Martin, David. Free the Genius: How the Very Best Grow Their Meaning, Mission, and Contribution. Ignite Press: 2019.
- Norman, Don A. The Design of Everyday Things. New York: Basic Books, 2013.
Podcasts
- Abrahams, Matt. Think Fast, Talk Smart. Stanford Business School. https://www.gsb.stanford.edu/business-podcasts/think-fast-talk-smart-podcast.
- Chollar, Troy, Nolan Haims, and Sandy Johnson. The Presentation Podcast. https://thepresentationpodcast.com.
- GhostRanch Communications. Presentation Thinking. https://www.ghostranch.com/podcast.
- Knaflic, Cole Nussbaumer. Storytelling with Data Podcast. https://www.storytellingwithdata.com/podcast.
- LaCroix, Darren, and Mark Brown. Unforgettable Presentations. https://deliverunforgettablepresentations.com/podcast/.
New Podcast Episode Available! “Presentation Pitfalls with John Polk”
This latest episode of The Presentation Podcast brings together hosts Troy, Sandy, and Nolan with special guest John Polk—author, workshop leader, and consultant—to discuss his new book, Presentation Pitfalls: Ten Traps Business Professionals Fall Into and How to Avoid Them (co-authored with Justin Hunsaker).
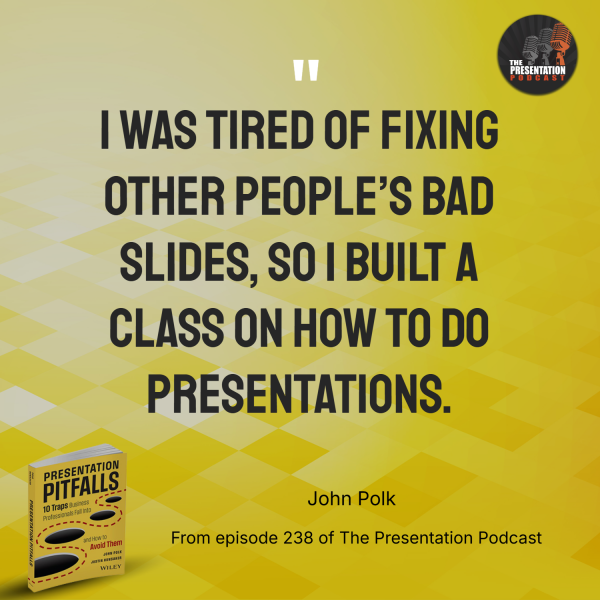
If you’re looking to elevate your business presentations game, then this episode is a goldmine! Discover deep insights into the most common mistakes professionals make and, more importantly, how to avoid them. New episode of The Presentation Podcast now available!
Listen on your favorite podcast app, or at The Presentation Podcast site here.