powerpoint

How Long is My Movie?

The Animation Pane does not show how long a movie is (like it does for all other animations). Here is one way to check, from inside PowerPoint, for PPT 2003, 2007 and 2010.

PPT 2003:
1. Select video

2. Right-click and choose EDIT MOVIE OBJECT

3. At the bottom of the MOVIE OPTIONS dialog it shows TOTAL PLAYING TIME

PPT 2007:
1. Select video

2. Under the OPTIONS Tab, click the MOVIE OPTIONS Pop-up Menu

3. At the bottom of the MOVIE OPTIONS dialog it shows TOTAL PLAYING TIME

PPT 2010:
1. Select video

2. Roll mouse over the dynamic playback bar to the end

– Troy @ TLC

By |2016-08-16T11:16:00-07:00August 6th, 2010|Tutorial|

Loop 1st Movie While the Second Plays Too

My sample slide shows 2 movies of heart surgery in action. Both movies are set to play at the same time (July 29 post) and set to loop (July 31 post). But here the presenter wants to talk to the 1st movie, and then click to play the 2nd movie.

The first step is to adjust the animations:
1. Open the Animation Pane

2. Select the 2nd movie and change its animation to ON CLICK

– I prefer to do this on the ANIMATION tab

– But the animation start for movies can also be changed on the PLAYBACK tab

3. Select the 1st movie and TIMING (to open the PLAY VIDEO dialog)

4. The REPEAT needs to be set to UNTIL END OF SLIDE vs. Until Next Click

** PPT 2003 and 2007 the default is UNTIL NEXT CLICK, so if modifying legacy presentations this will need to be checked. PPT 2010 the default is UNTIL END OF SLIDE, so it ‘automatically’ sets up the 1st movie to continue playing while the 2nd plays.

– Troy @ TLC

By |2016-08-16T11:16:20-07:00August 4th, 2010|Tutorial|

Set Movies to Loop

Here is my same sample slide from an earlier post. Because this is a short seamless animated loop it is usually set to loop. Setting a movie to loop takes only a few easy steps.

1. Select movie

2. With the movie selected the VIDEO TOOLS functions are added to the ribbon.

3. Go to the PLAYBACK tab and click LOOP UNTIL STOPPED

Then repeat the same steps for the 2nd movie. The animation pane does not show the movie playback time, just a simple ‘appear’ icon. But if you repeat (eg. loop) any other element (text, shape, picture, etc.) the timeline shows the length of each loop and how many repeats it is set to do. For comparison, here is the animation pane the movie and three inserted shapes all set to repeat 3X’s. The vertical line is the end of the animation and then the repeat – which only shows up on the shapes, the movie animation only shows the play icon (no looping information).

– Troy @ TLC

By |2016-08-16T11:16:50-07:00August 2nd, 2010|Tutorial|

Movie Playback Default in PPT 2010

PPT 2010 has a different default when inserting videos than previous versions. Basically it no longer asks how you would like the movie to play and simply inserts the movie with a preset play action. Unfortunately for me, the default action is not the one I ever need…

The default action sets up the video to play when clicked on with the mouse. In the animation pane, this is what you see – a trigger animation.

To be fair, I see this animation setting used by many presenters, so it is a vailid option as a default action. What makes it difficult is that there is no option to change the default behavior – we are all forced to go with what the Microsoft analysis deemed the best default action.

– Troy @ TLC

By |2016-08-16T11:18:30-07:00July 27th, 2010|Tutorial|

Where is the PPTools Expert Mode Setting?

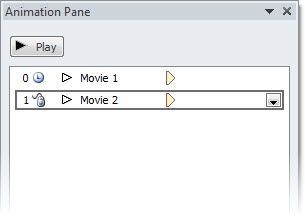
I have been using the PPTools “Starter Set Plus” Memorize Position tool.

Here is a typical use:

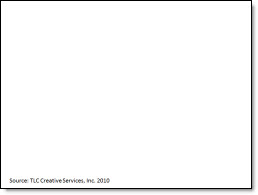
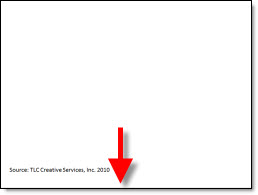
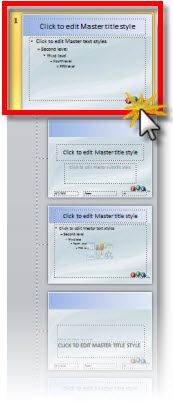
1. I have a reference/source line at the bottom of a slide

2. I want to have all other reference/source lines throughout the presentation in the exact same position. So on this slide the text box needs to move down

3. A common way to do this, without additional add-ins, but very tedious is to zoom in and position guidelines on the original text and then manually move other text boxes to align with the guidelines

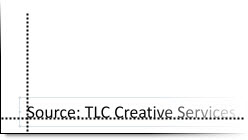
4. The easier and more accurate solution is to select the original text box and pick up its position with the “Memorize Position” addin (left tool)

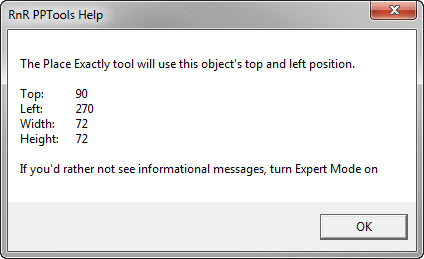
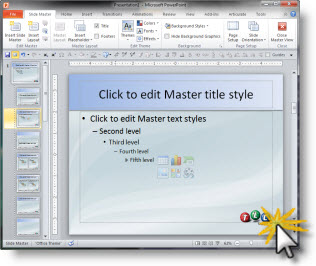
5. But work is interupted by this information dialog

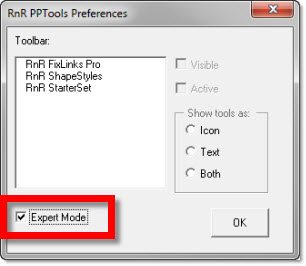
– Note the last line about turning on Expert Mode to not show the dialog – so where is the expert mode?

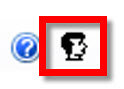
6. Click this icon on the Master Toolbar (one of the toolbars installed with any PPTool add-in)

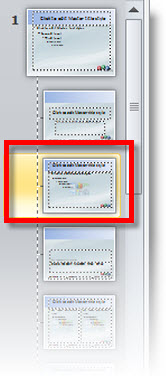
7. The RNR PPTools Preferences dialog opens. It shows all of the PPTools add-ins installed and at the bottom is the check box to turn on/off expert mode

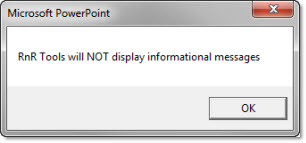
8. This dialog message pops up, click OK

9. Done! Now use the Memorize and Place tools without having an extra dialog interupt the work.

– Troy @ TLC

By |2016-08-16T11:25:04-07:00June 23rd, 2010|Tutorial|

4 Ways To Zoom In/Out While Editing

In the lower right is the zoom options.

(1) The first option is largely unknown to many users, partially because it is not needed often. Clicking the percentage number opens the zoom dialog that has presets and ability to manually enter a specific zoom.

(2) The zoom slider was introduced in PPT 2007 and a is a great way to adjust the zoom level. Zoom ranges from 10% to 400%.

(3) Clicking the far right box is the ‘Fit to Screen’ option which I use a lot!

(4) The fourth option is a combination keyboard/mouse feature.
– Hold the CTRL key
– Roll the mouse scroll wheel. Forward = zoom in. Backward = zoom out.

– Troy @ TLC

By |2016-08-16T11:25:22-07:00June 21st, 2010|Tutorial|

Why Can’t I Move The Logo on the Master Slide?

Here is my sample slide:

I decide the logo, on the master slide, needs to be moved down for more content area.

When go to VIEW >> SLIDE MASTER and try to move the logo I cannot click and select it.

Because the master slide view opened to the layout slide.

If I click the Master Slide above the layouts I can select the logo, move it and it will update on all of the layout masters.

– Troy @ TLC

By |2016-08-16T11:32:15-07:00June 2nd, 2010|Tutorial|

The New View of ‘Arrange All’ Presentations!

PPT 2010 now displays each presentation in its own instance of the application. What does this mean?

Here is a real world example (eg. my current project), where I have 2 screens and a separate presentation for each. In designing I need to view the presentations side-by-side. To do this it is the same as before: VIEW >> ARRANGE ALL. This is a screen capture of one monitor.

But the big difference is each presentation is contained in its very own application. Each has its own ribbon!

This is just one example of the new feature – and I am using it every day.

– Troy @ TLC

By |2016-08-16T11:32:35-07:00May 30th, 2010|Tutorial|

Toggle Normal Edit view and Slide Sorter View

In the lower right corner are the shortcut buttons to change the view (normal, edit, slide show – and reading in PPT 2010), plus the zoom tools.

In my sample I am in the Slide Sorter view:

If I want to edit an individual slide, I select the slide and click the far left button for Normal/Edit view.

But the Slide Sorter button is also a toggle. When in Slide Sorter view, click the slide sorter button again and you change to the Normal view. Click it again and you go back to Slide Sorter.

This works in PPT 2007 and 2010. Not really a time saving shortcut as the buttons are literally next to each other – but it is a little known feature.

– Troy @ TLC

By |2016-08-16T11:33:17-07:00May 26th, 2010|Tutorial|
Go to Top