tutorial

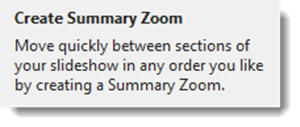
Create A Summary Zoom

The Summary Zoom feature automates a few things:

  • Adds PowerPoint Sections automatically
  • Adds a Summary, or Navigation, slide automatically
  • Automatically adds slide thumbnail images of slides that are navigation links

Here is how the PowerPoint’s help dialog explains Summary Zoom:

Summary Zoom 01

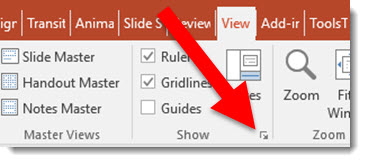
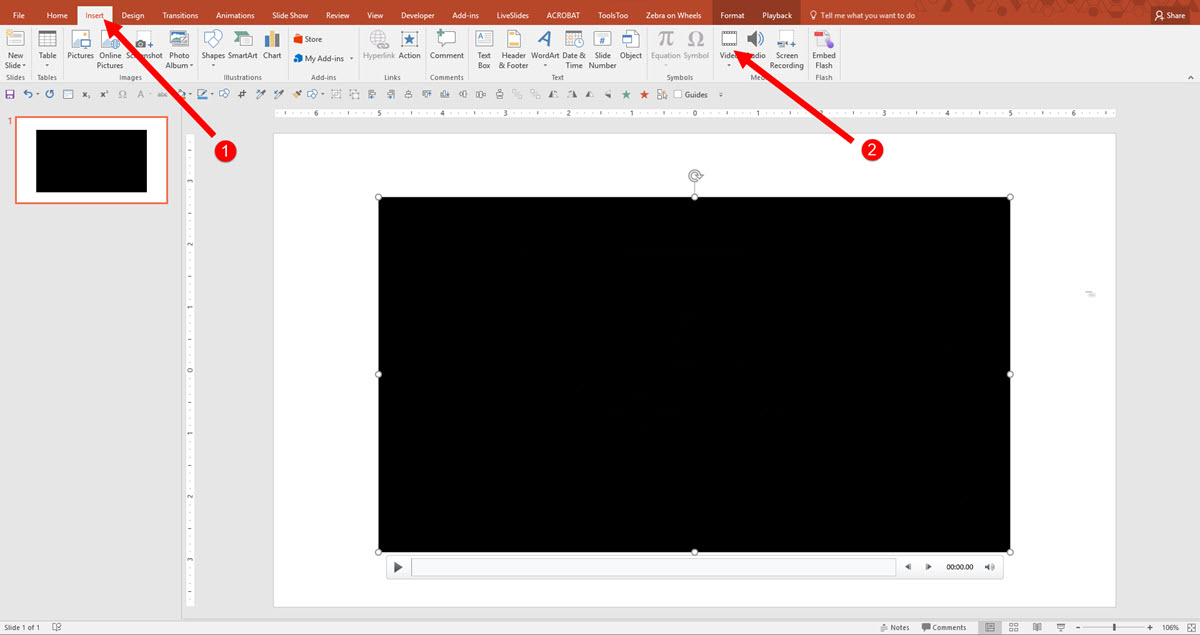
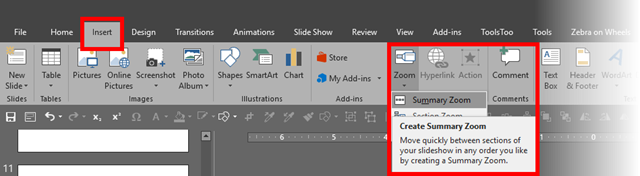
To create a Summary Zoom, go to INSERT > ZOOM > SUMMARY ZOOM

Summary Zoom 02

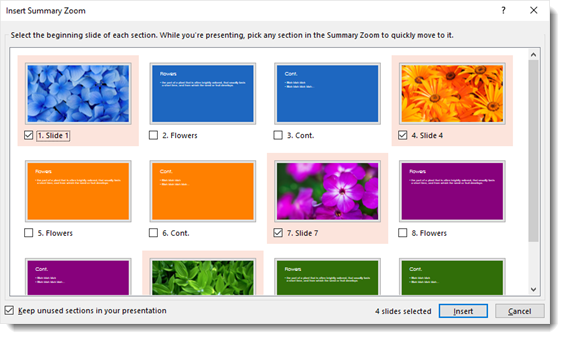
From the pop up Summary Zoom dialog, click each slide that you would like to start a new section and be added to the Summary Zoom slide.

Summary Zoom 03

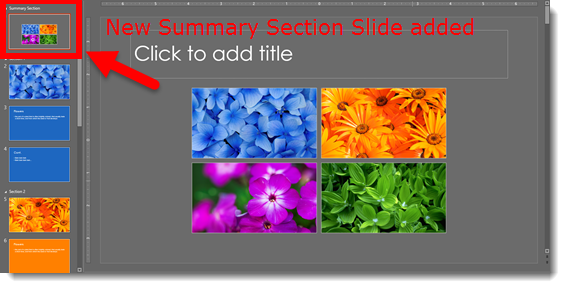
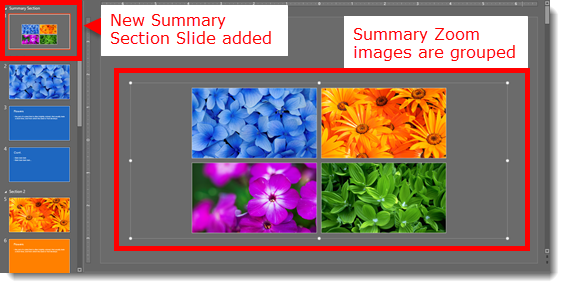
A new “Summary” slide is added to the presentation. The Summary slide has a grouped set of images that are thumbnails of selected slides and have all programming added to make them presentation navigation elements. In addition, each slide that was selected in the Summary Zoom dialog is the start of a new section.

Summary Zoom 04

The thumbnail group has some good, and maybe not-so-good, points.

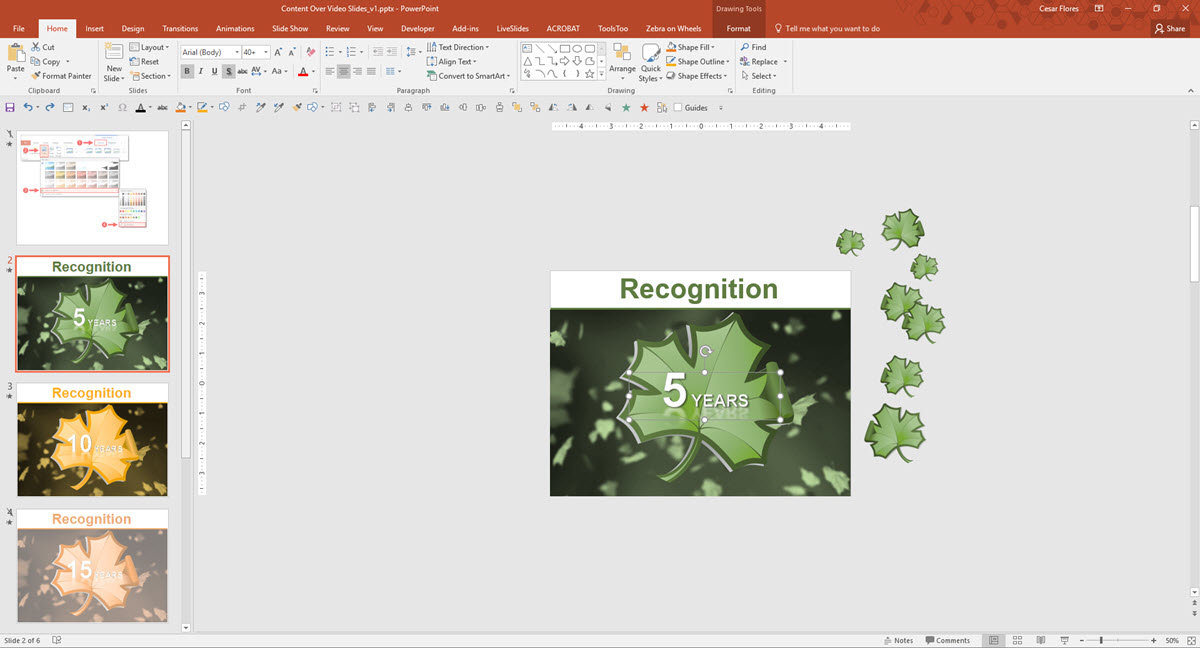
  • Each thumbnail image is exactly what is on the slide it links to.
  • If you update the slide content, the thumbnail automatically updates (dynamic live content)!
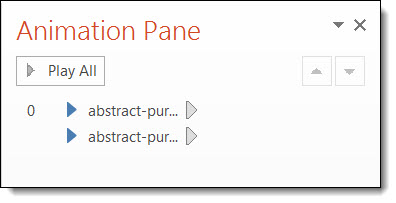
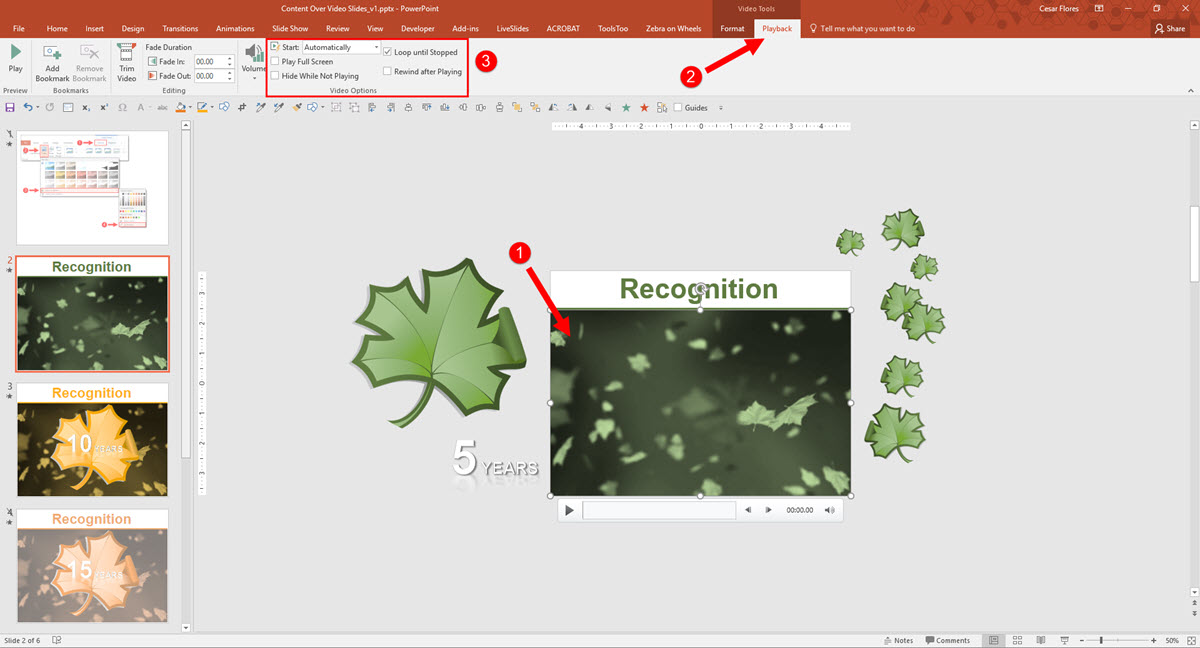
  • The thumbnail image shows exactly what is seen on the slide, animated content cannot be taken into account. So if the slide starts blank and then content animates on, the thumbnail will show the animated content. Basically, whatever would print is what will be visible on the thumbnail.
  • The images cannot be ungrouped.
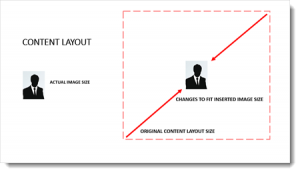
  • The bounding box for the group is much larger than the thumbnail images.
  • Images can be moved, resized, and to a limited degree, stylized, (eg. drop shadow, bevel, reflection, and rotate all work). But Z-order (front to back) cannot be changed. Rearranging and resizing can be tedious within this locked group element.
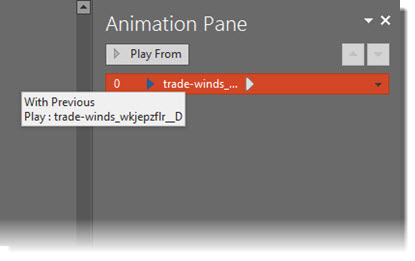
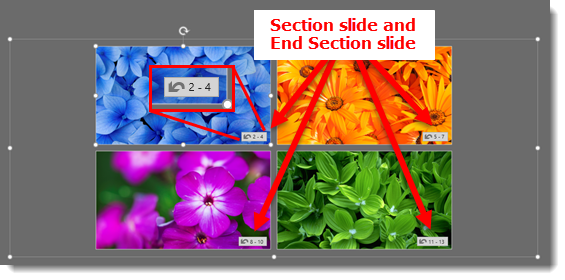
  • When selected, in edit view, each thumbnail displays a link icon showing it has an active link and where it links to! The arrow (that appears to be indicating backwards or return) means the thumbnail has a link to go somewhere. The numbers show Section number and how many slides are in that section.

Summary Zoom 05

Sumamry Zoo,06 

  • In addition, the link icon visually shows when a thumbnail does not have an active link by removing the thumbnail image and displaying a broken link icon.

Summary Zoom 07

The Summary Zoom is a great new feature. It also introduces some fantastic new tools to PowerPoint (like icon links and dynamic live content updating) that I hope to see expanded into other areas of PowerPoint. Many thanks to Wanda, a TLC staff designer, for developing and testing the demo slide deck used for Summary Zoom. Here is a demo video showing how quickly Summary Zoom and non-linear presenting options can be added to a presentation.

-Troy @ TLC

By |2016-09-18T16:32:57-07:00August 24th, 2016|PowerPoint|

PowerPoint Content vs. Picture Placeholders

Inserting an image using the preset Picture Placeholders seems like a super shortcut, until things get frustrating with why images do not insert the same way every time a Picture Placeholder is used. The reason, almost always, is knowing there are two types of Placeholders – and each handles images differently.

Here is an explanation and example using a Content Placeholder vs. Picture Placeholder – and as a side note, neither option works the way I feel it really should…

CONTENT PLACEHOLDER

Inserting an image in the Content placeholder, identified by this icon, offers the option of inserting various elements: Tables, Charts, Smart Art, Video, and Images.

Insert Content icons

Inserting an image in the Content placeholder adjusts the layout to the size of the actual image. If you insert a small image, the placeholder shrinks to the small size image. If you insert a large image, the image will at maximum be the size of the slide and the placeholder will grow to that size. The downside is the preset position and size on the master layout is ignored and the slide content needs to be manually repositioned and sized.

Content placeholders


PICTURE PLACEHOLDER

Inserting an image in the Picture placeholder adjusts image to fill the size of the layout. The downside here is the image is often cut off and needs to be repositioned and resized using the Crop tool.

Picture placeholders


While both Placeholder options are pro’s and con’s, at least now you have an idea of what PowerPoint is doing and what to expect.


-Troy @ TLC

By |2016-08-09T18:15:45-07:00August 15th, 2016|Tutorial|

Using Morph for Animations

The PowerPoint Morph transition is PowerPoint’s best new animation feature!

using morph for animations

We have been leveraging the fantastic new transition in lots of presentation projects since its release, including using Morph for animations. Here is another example where we used Morph as the animation effect. Our client wanted to show the above three statements. The real request was to emphasize each as they were addressed. Our first step was to convert the provided bullet list into a dynamic visual; the end result was the above slide.

For the “emphasize each” request, using the Morph transition as our animation, we created a dynamic “flip” animation effect. It also was something that did not look like “PowerPoint.” Below is a video of the final animation effect:

[KGVID]https://thepowerpointblog.com/wp-content/uploads/2016/08/unnamed-file.mp4[/KGVID]

  • After the slide layout was approved, we duplicated the slide 3X.
  • On the first slide, we added the animated entrance effect for the 3 circles and text.
  • On the second, third and fourth slides, we simply horizontally flipped each circle. No animation on these slides. The Morph transition created the nice twirl, or flip, animation.
  • Done!

using morph for animations


– Troy @ TLC

By |2019-10-28T09:57:42-07:00August 5th, 2016|Portfolio, PowerPoint, Tutorial|

Snap to Grid and Nudge

Why do shapes sometimes jump further than you want when moving them with the arrow key? What is the PowerPoint Grid? How are they connected?

Let’s start with the PowerPoint Grid. Using a PowerPoint Grid can be a great tool for slide layout and design. To turn it on/off go to VIEW > SHOW > GRIDLINES check box. Once it’s checked, you’ll see a dotted line grid like this:

PowerPoint Grid-1

There are some options, such as the grid spacing, and another way to turn on/off. Open the GRID AND GUIDES dialog by going to VIEW > SHOW > click the Options box:

Nudge-3

The GRID AND GUIDES dialog has several options for guides, snapping, and grids:

Nudge-4

1- DISPLAY GRID ON SCREEN is the same as the above VIEW > SHOW > GRIDLINES. Both turn on/off the gridlines.

2- The spacing, or size of the grid, can be changed here. (Note: The grid spacing is used for the document, so you cannot have a different PowerPoint Grid mixed into a single presentation file.)

3- SNAP OBJECTS TO GRID is what enables objects (shapes, photos, lines, etc.) to “jump” to a location when you are moving them. They are “jumping” to the next gridline. (Note 1: The grid does not need to be visible/on for this to be active. Note 2: I personally do not like objects jumping to locations, so Snap to Grid is turned off on my design computer.)

4- DISPLAY DRAWING GUIDES ON SCREEN can also be accessed a few ways, including as a button on my custom QAT (Note: I use guides in my design process much more than grids).

5- DISPLAY SMART GUIDES WHEN SHAPES ARE ALIGNED is a love-it or hate-it feature (I am in between and turn this on/off as the design needs). It is like SNAP TO GRID, but instead objects snap into alignment with other objects.

 
Back to our original question, why do objects “jump” further than you want when moving with a mouse? The answer is NUDGING, or moving an object with the arrow key, is directly connected to SNAP OBJECTS TO GRID. If my goal is to move the blue box to the right and touch the next grid line, the number of arrow nudges is going to depend on whether the Snap to Grid is on or off.
.
.
Example 1 – Snap to Grid = OFF
– With Snap to Grid turned off, I have complete control moving an object, each arrow nudge is 1 pixel. In this example, I would need to arrow/nudge 10 times to move the blue box to touch the next grid line (the blue box is 10 pixels away from the grid line).
Nudge-5
.
 
Example 2 – Snap to Grid = ON
– With Snap to Grid turned on, I have less control moving an object, each arrow nudge jumps to the next grid point. In this example, the next grid point is the next grid line, so 1 arrow/nudge jumps the blue box to touch the next grid line, which may be good or bad (or frustrating).
Nudge-6
 .
 
Here is a close up of the grid points. With this 1/10″ grid, there are 10 points in any direction, and an object will nudge at the most 10 clicks to move across the grid (but the grid in this example is actually 300 pixels wide/tall).
Nudge-7
 
 .
 
TIP: There is a great hidden feature to override SNAP TO GRID, actually temporarily switch its ON/OFF so nudging does the opposite, use CONTROL key + Arrow key (in any direction)
Nudge-8
 .

Summary (thanks MS Blair for sending out this simplified grid! [which I modified]):

Nudge-9

-Troy @ TLC


By |2016-08-10T08:19:44-07:00April 27th, 2016|Tutorial|

Hightail Spaces Video Proofing

Hightail, formally YouSendit, has introduced a new tool, Hightail Spaces. So in addition to the file sharing services, they have added an online tool for video and image feedback.

hightail spaces 10

Using Hightail Spaces for client file review is pretty straight forward and similar to Wipster (see previous post). Here is a quick walk through of the collaborative process:

1. Log in (or sign up) to your account, and click on the Spaces tab.

2 Hightail Spaces

2. If it is your first time accessing, click Get Started, and Accept.

3 Hightail Spaces

4 Hightail Spaces

4. All of your Spaces show up, which makes it easy to have separate folders/Spaces for each client or project.

5 Hightail Spaces

5. Hover over a Space and click to View any files, get a share link, or delete that Space.

6 Hightail Spaces

6. Spaces can be personalized to a project or client with a: (1) custom name and (2) description. The (3) chart icon shows the analytics of that Space.

7 Hightail Spaces

7. When viewing a space, use the Share button to invite clients to securely view any files in there.

11 Hightail Spaces

8. To add a video for review, either Drag and drop or click the plus icon (which also allows files to be uploaded from other services: Dropbox, Google Drive or Microsoft OneDrive).

8 Hightail Spaces

9. Once uploaded, every file is displayed with a preview thumbnail.

9 Hightail Spaces

10. To review, your client just clicks on the thumbnail which opens the video preview and the comments side panel. To add a comment, drag a marque directly on the video and type any comment, then click Post.  The comment pane lists all of the comments and replies. A really great feature is that the video playback has a red dot for each comment.

10 Hightail Spaces

10. Spaces allows multiple versions. The current version is displayed at the top of the page. Previous versions are viewable by clicking on the version number in the list.

12. Access and share links are controlled by the overall Space and the individual files. (1) Access can be public or private (2) Copy a link to send in an email, text or IM. (3) Access options include edit, comment, download, and (4) Share directly on Slack (if you use that).

Note: Download options are only available with a paid subscription.

12 Hightail Spaces

Hightail Spaces is another client review option to check out. There are both free and paid options.


-Troy @ TLC

By |2016-08-10T08:21:07-07:00April 22nd, 2016|Resource/Misc|

Use The PowerPoint Video Playback Bar

Inserting video into Powerpoint is an easy task. Using the video playback bar also makes controlling the video playback easy.

playback bar 1

The playback bar is available in slide edit view – when a video is selected, it appears. The playback bar can be used to preview the video, click-and-scrub through a video, pause a video, and see a live time code.


During a presentation, when the mouse is moved over the video, a simplified semi-transparent playback bar will pop up. Most of the same functions are available; time code and incremental incremental jumps are not on the playback bar in slideshow.

5-2B

The playback bar position cannot be moved (although this functionality is definitely on my wish list for the Microsoft Dev team). When the cursor is moved off the video, the playback bar hides almost immediately (and reappears with any mouse movement over the video).

Slideshow playback control options:

  1. Play / Pause Button.
  2. Timeline bar (click anywhere on timeline and jump video to that position, click-and-drag and “scrub” through the video forward and back).
  3. Volume Control (very helpful for muting a video during a presentation).


7


The semi-transparent playback bar is not overly distracting because it’s nicely designed. Here are a few examples over different color videos. In addition, these two videos are on the same slide, side-by-side. See demo video of this slide below.

9-1B

Here is a video demo of interacting with videos during a slide show.

[KGVID]https://thepowerpointblog.com/wp-content/uploads/2016/03/unnamed-file.mp4[/KGVID]

-Troy @ TLC


By |2019-10-28T09:58:50-07:00March 23rd, 2016|PowerPoint, Tutorial|

Stretched Video using Powerpoint

What we’re doing here is creating a top and and a bottom banner by inserting a stretched video with animation. There is a video demonstration below.

The video used for this blog was sourced from Videoblocks.com. The aspect ratio of HD MOV 1920 x 1080.

Link to sourced video Abstract Purple and Magenta Sparks

Stretched Video in Powerpoint

1

To insert a video > insert tab > video > for this blog I am using the “VIDEO ON MY PC” option. This will insert the video at original aspect ratio 1920 x 1080.

insert_video


2

Scale the video to fill the width and height of page.

scaled_video

3

Scale the video from the bottom/center tab of the video to shorten the height. This creates a scaled video banner.

video_scaled_top


4

Duplicate and send the other video to the bottom of the page. Select both videos > Animation Tab > Click Play > Click the Animation Pane > Start with Previous. This allows both videos to be played at the same time on the initial startup.

Auto_play_video

animation_pane

5

With both videos selected Click on > Video Tools Tab, then Playback Tab > Start Automatically > Loop until Stopped.

This allows both videos to play automatically and loop in Slide Show Mode until stopped.

stretched_video

loop_video


Pros and Cons

Pro for stretching a video: By using a stretched video, the user can display the video in numerous shape and scale options, creating a unique styling display.

Cons for stretching a video: Stretching a video may work for most abstract displays, however it will not retain the original scale ratio of the object being displayed and will result in ruining the original image.


Christie @ TLC

Video Demonstration

[KGVID]https://thepowerpointblog.com/wp-content/uploads/2016/03/unnamed-file-4.mp4[/KGVID]


By |2019-10-28T10:05:23-07:00March 16th, 2016|PowerPoint|

2 Second Rule for Auto Transition after Video

Using auto advance for transition is easy, but calculating when a video will end in order to add in the correct auto advance timing is tedious.

auto_tran_1

However, it turns out that we do not need to actually figure out how long a video is because PowerPoint cannot use the auto transition feature to override a video that is playing and advance, even if we want to (the solution is to trim the video to the shorter duration or manually advance the slide).

TLC’s best practice is the 2 second auto advance

Slide has video, presenter wants presentation to automatically go to next slide when video is done – easy.

On video slide, set to auto advance after 2 seconds. This assumes the video is the only animation and it is going to start playing automatically.

auto_tran2

PowerPoint will go to the video slide, then the video will start playing and trigger to auto advance to next slide after 2 seconds, but it cannot do so until the video is done playing, so it waits for the video to finish. When the video play animation is done, the slide automatically advances to the next slide! We use this feature to help us easily setup what could be a complex request.

See the video example below:

[KGVID]https://thepowerpointblog.com/wp-content/uploads/2016/03/unnamed-file-2.mp4[/KGVID]

– Amber @ TLC


By |2019-10-28T09:59:57-07:00March 11th, 2016|PowerPoint|

Recolor Content with Powerpoint Tools

In PowerPoint, you can place content on top of a video background to create a dynamic and dimensional design.

Find a great example we created here:

[KGVID]https://thepowerpointblog.com/wp-content/uploads/2016/03/unnamed-file-7.mp4[/KGVID]

Here’s how to create a similar effect to your video

1

Insert  (1) Video onto your Canvas , click (2) Video and select your Video.

2016-03-01_11-02-20


2

To recolor your video, click on (1) Format Tab, select (2) Color tool in the drop down, you get Recolor options.You can add custom colors by Selecting the (3) More Variations or using the (4) Eyedropper tool.

1_ Recolor Content Over Video


3

Once you are satisfied with the styling of the video, select your (1) video on the Canvas, select (2) Playback, set the video to (3) Start Automatically and Loop until Stopped.

2016-03-01_11-35-523

4

Next, add stylized text and graphics directly on top of the video and animate as desired. The end result is a slide with content that animates directly on top of the video background.


2016-03-01_11-54-45


-Michelle @ TLC

By |2019-11-12T11:50:22-07:00March 2nd, 2016|PowerPoint, Tutorial|

Create a Picture Frame Using a Video

Here’s how we created a Video Picture Frame in PowerPoint

My example is a standard 4×3 slide. The goal was to create a picture frame that was full slide size and for the picture frame to have motion. By layering a video under the photo and sizing it to the same aspect ratio as the photo, the result is a dynamic motion picture frame. The steps to make it happen are pretty easy.

Step 1

Add the photo to the slide (we prepped this image in Photoshop by making it semi-transparent and saving out as a .png).

Video Picture image 01

Step 2

Add the video to the slide, send to back, resize and crop to proportionally be a bit larger than the photo.

Video Picture Frame-centered


Step 3

Fine tune position of video and photo. Select both and use the ARRANGE > ALIGN > ALIGN CENTER and ALIGN MIDDLE to make them exactly centered on each other.

Video Picture image 03

Step 4

Set video animation. Select the video, remove the current trigger animation, add a new PLAY animation set to WITH PREVIOUS.

VideoFrame Animation

Step 5

Set video to loop. Select video, go to PLAYBACK > VIDEO OPTIONS > LOOP UNTIL STOPPED.

Powerpoint Video Picture Frame 6

Step 6

Stylize video with an outline and drop shadow. Stylize photo with an outline and inner shadow.

Video Picture Frame with Shadow

Step 7

View in slide show!

[KGVID]https://thepowerpointblog.com/wp-content/uploads/2016/02/unnamed-file-1.mp4[/KGVID]

-Troy @ TLC


By |2019-11-15T09:42:16-07:00February 22nd, 2016|PowerPoint, Tutorial|
Go to Top