Tutorial

Tineye – Find Images Online (3)

TinEye has a web browser plug-in, so you can right click any image on a page and search the database directly. The free plug-in is available for Internet Explorer, Firefox, Chrome, Safari and Opera. To use, pick any online image.

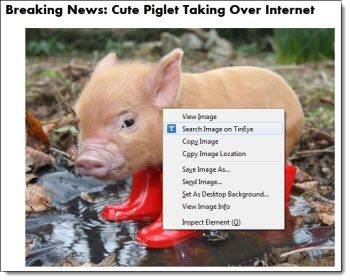
1. For this image, we want to find a higher resolution version. Right-click the image and select “Search Image on TinEye.”

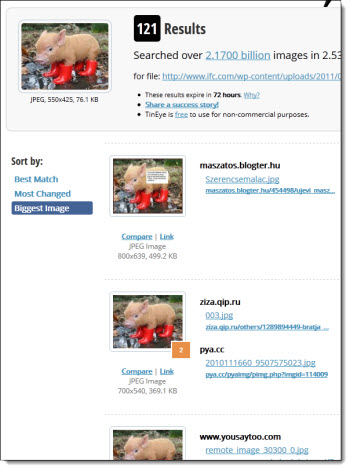
2. TinEye found 121 results, and using the Biggest Image sorter, there is a 800x635px version available*.

– Troy @ TLC
By |2016-08-16T08:53:28-07:00December 21st, 2012|Resource/Misc, Tutorial|

Tineye – Find Images Online (2)

TinEye, the reverse image search site can also be used for some detective work.

Let’s use TinEye to check if an image is being used by another website without permission. Here is a beautiful photo by my friend and incredibly talented photographer, Rikk Flohr, from his webpage.

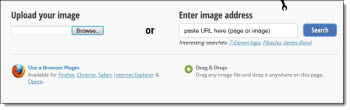
1. To do a quick web search for non-permitted use of this photo, I loaded it into TinEye using the drag and drop feature.

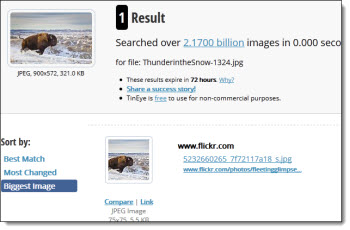
2. TinEye’s search only found 1 result, which is actually Rikk’s Flickr account.

3. Of course, no search engine covers the entire internet. TinEye is constantly crawling webpages and updating the image database. And this image search proves it is possible other instances of an image exists online. The test image was found on Rikk’s Flickr account, but missed it on his actual webpage. I assume TinEye hasn’t yet crawled Rikk’s site or it is possible the site is already protected in which case TinEye can’t get the image information.

– Troy @ TLC
By |2016-08-16T08:53:47-07:00December 19th, 2012|Resource/Misc, Tutorial|

Tineye – Find Images Online (1)

TinEye is a reverse image search engine. It can be a great resource for presentation design.

TinEye lets you upload, or link to an online image, and see where it came from, find higher resolution versions, how/where it’s being used and if there are modified versions. It is the first image search engine to use image identification technology rather than keywords, metadata or watermarks. When you upload an image to be searched, TinEye creates a unique digital signature for it, and then compares this signature to every other image in their index to find matches. In our tests, TinEye did not generally find similar images, but exact matches – including those that have been cropped, edited, or resized.

The free service allows 50 searches per day, up to 150 searches a week. There is a paid version of TinEye which allows for more searches.

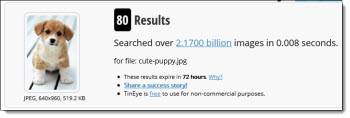
TinEye is easy to use. Here is our sample image and the goal is to find a high res version.

1. On the TinEye webpage, click “Browse” to upload the image. The sample image is fairly small at 350×520 pixels.

2. TinEye search of its database for this image found 80 matches.

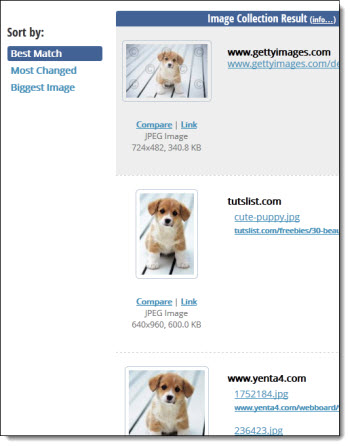
3. The default search result is set to Best Match.

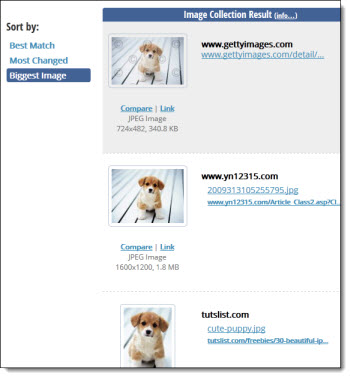
4. Changing the sort by Biggest Image, I find a link to the same image that is 1600×1200 pixels!

Note: Most images found online are protected by copyright. If you would like to use any image found through TinEye for commercial purposes, you should confirm it is available under Creative Commons, or contact the image owner for permission.

– Troy @ TLC
By |2016-08-16T08:54:05-07:00December 17th, 2012|Resource/Misc, Tutorial|

Microsoft Security Update Causes Fonts Not to Display in PowerPoint

I was contacted by another presentation designer yesterday about a really bad presentation issue he experienced after installing Microsoft updates (thanks Don!). Then, a number of other users started posting their issues on MS Answers.com. This is a big deal for many presentation designers!

ISSUE: After installing Microsoft Security Update KB2753842, PowerPoint is unable to display certain fonts.

FONTS AFFECTED: OTF, Open Type Fonts. Microsoft ships TT (True Type) fonts, so all standard Microsoft fonts are unaffected.

WHAT HAPPENS: PowerPoint behaves normal and in edit view, all fonts display fine. When run as a slide show, all Open Type Fonts (OTF) do not display.

FIX:
– Remove Microsoft Security Update KB2753842
– To Remove:
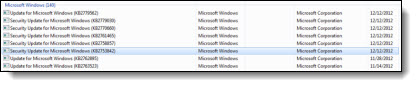
Start >> Control Panel >> Unistall a Program >> View Installed Updates(link on left) >> scroll to Microsoft Windows section >> search for “Security Update for Microsoft Windows (KB2753842)” >> right click >> select Uninstall >> say “Yes” to confirmation >> restart computer

Update 12/20/12: MS has confirmed “An updated security patch has been released at 10:00am today, fully tested this week by Office teams.” So PPT is once again safe to use.

Update 12/17/12: Earlier note that the update has been pulled is not completely accurate. The update has been ‘pulled’ from the auto install status, but still shows up in the optional installs. If you see it in the optional installs, see note below on how to hide update.

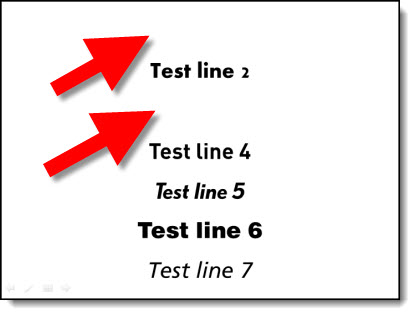
Update 12/16/12: This issue is much larger than only affecting OTF fonts. In PowerPoint and Word (2010), several TTF fonts (you can test with Myriad Pro) will also disappear is any formatting (shadow, outline, bevel, etc.) is applied. This text will actually disappear in the edit view, as well as in slide show. Plus the KB update creates similiar issues in several other applications (Flash, Corel Draw, etc.).

Update 12/15/12: Microsoft has a KB information article on the issues caused by installing KB2753842 here.

Update 12/14/12: Microsoft has confirmed that it has pulled the update and working on a fix. So if you have not installed, it should not show up. If you uninstall, it will not be an option to install again. And if you are in an enterprise environment with automatic group policy updates, it will not reinstall again the next day.

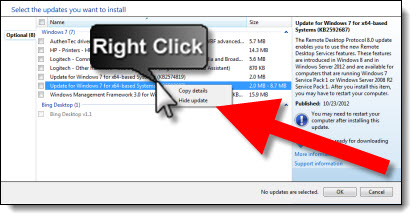
Update 12/14/12:  If the update KB2753842 has not installed, but is pending (ie. downloaded automatically, but not automatically installed), it will not show up in the above Uninstall a Program instructions. Launch WINDOWS UPDATE >> view available updates >> if KB2753842 is listed >> Right-click >> select HIDE UPDATE.

– Troy @ TLC

By |2016-08-16T08:54:26-07:00December 13th, 2012|Tutorial|

Web Fonts in Presentations

Web Fonts have been a big topic recently and several companies are offering them. TLC staff designer, Amber, spent some time researching them for us and put together a good overview and example of their use with the Google Web Fonts.
– Troy @ TLC
———————————————–

Web Fonts are a font format with a specific license that permits web designers to use real typography online without losing the benefits of live text (dynamic, searchable, and accessible content). Until recently, type on the web was very limited. Most sites could only display the small selection of system fonts installed on user’s computers. Designers who wanted to integrate individuality to their pages would need to create jpeg images (which don’t get read for Google search results) or use Flash or JavaScript to render their fonts, even though not all end-users had started using that software.

Now, there is a CSS declaration called @font-face that web designers can use to specify a font. The font file will either be saved on your server like images are, or it can be hosted by a third party.
The issue that is still being debated is achieving an approximate consensus on how the producers of fonts could continue to control and therefore profit from their work.

Click here for a list of commercial font foundries which allow @font-face embedding.

Cick here for a list of fonts available for embedding.

Google offers a library of web fonts with no restrictions here.
Plus, all of the Google Web Fonts are offered under the Open Font License which means you can use them even in commercial projects without having to worry about licensing issues.

You can utilize Google’s Web Fonts in your PowerPoint presentations too. Although I am not using it as a true “web” font, but really adding it to my computer as a custom font, here are the steps for use:

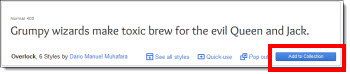
1. In the Google Web Font library, select the font you would like to use in your presentation, and select “Add to Collection.”

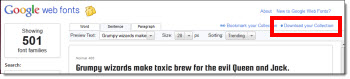
2. Once you’re done adding fonts to your collection, click the “Download your Collection” link at the top right of the page.

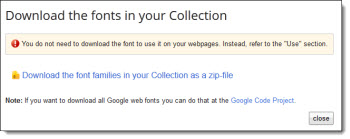
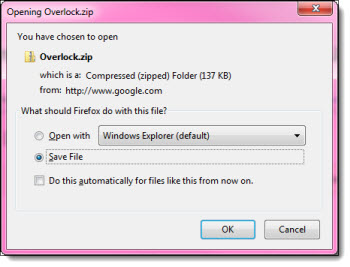
3. A window will pop up letting you know that you don’t need to download the font to use on the web – however, we do need to download to use in PowerPoint, so click the link to download the font collection as a zip file.

4. Once you’ve downloaded and extracted the font file from the zipped folder, you can install the Web Font on your system and use in your PowerPoint presentation. (Note: If you are planning on sharing your presentation, you will need to also provide the font or risk having the font default to a generic font when PowerPoint can’t find the file installed on others’ computers).

By |2016-08-16T08:55:32-07:00December 5th, 2012|Tutorial|

Sample Video of 4×3 and 16×9 Aspect Ratios

“What is the aspect ratio?” It has become one of the first questions for presentation and video projects. It is still a very confusing concept for many people. We use a simple video of each aspect ratio for clients to see the difference. It is the same video footage, which makes it easier to see the 4×3 aspect ratio is taller and the 16×9 aspect ratio is wider.

4×3 aspect ratio
[youtube src=”https://youtube.com/embed/gQaXbSPQoDQ?rel=0″]

16×9 aspect ratio
[youtube src=”https://youtube.com/embed/NTRV8ISqE1A?rel=0″]

– Troy @ TLC

By |2016-08-16T08:55:56-07:00December 3rd, 2012|Resource/Misc, Tutorial|

QR Codes For Your Presentation

A “QR” Code is a “Quick Response” Code. Think of them as UPC, or SKU, codes on steroids.

The QR code is a great way to allow an audience to quickly capture your contact information, website, or your department’s page on the company intranet. And, using a QR code is free! Plus, virtually every online capable smartphone has free QR code reading applications. To use, just launch the app, take a picture of the QR code and it will automatically open a webpage.

At TLC Creative Services’ PowerPoint training programs, I open the session with a list of resources, one being a QR code to this blog. At the end of the training, my “Thank you” slide includes a QR code that goes to the TLCCreative.com contact page. Both are much quicker and easier than everyone scrambling for a pen to write down the info (and everyone has their phone out reading email, texting and probably checking the score of the game already).

There are many websites that let you create your own QR code for free. For this tutorial, I am using BeQRious.

What sets this site apart from many other free QR code generators is the numerous types of QR codes you can generate, but also the tracking and managing of your QR codes and data. Plus, generating a code is simple.

1. Select the type of code you want to generate: choose from web URL, email, phone, text, vCard, SMS, YouTube video, Facebook profile, Twitter profile, map, or graphical. Enter the information into the text box.

2. Customize the color of the code (QR codes do not need to be black and white, just high contrast).

3. Download the QR code as a JPG, PNG, GIF, or PDF. And this site lets you choose how large you want your file size to be. The PDF option is great because you get your code as a fully scale-able vector image that can be made as large or small as you’d like, without losing any quality. At TLC Creative Services, we open the PDF in Adobe Illustrator and export as a .emf to have a vector (ie. scalable) graphic for PowerPoint. Or export as a .png is another good option for use on PowerPoint slides.

4. You can then insert your new QR code into your presentations to make it easy for your audience to connect with you.

5. Within PowerPoint (using 2007 and above), use the Picture Color feature to change the QR Code to any of the template colors. As long as there is contrast between the QR code and the background, it will work.

– Troy @ TLC

By |2016-08-16T09:01:22-07:00October 26th, 2012|Tutorial|

PowerPoint’s Image Reset Tool

How do you remove styling (drop shadow, bevel, shape, cropping, etc.) that has been applied to an image? – IMAGE REST.

1. Insert image on slide.

2. Resize image to fit slide, format and crop.

3. With the image selected, under the Format tab on the ribbon, there is the Reset Picture button with 2 options: Reset Picture or Reset Picture and Size.

4. Reset picture will remove all formatting done to the image – but the size and cropping will be left.

5. Reset Picture and Size will remove all formatting, cropping, and sizing and revert the image back to the original.

– Troy @ TLC

By |2016-08-16T09:01:38-07:00October 24th, 2012|Tutorial|

Insert YouTube Video Into PowerPoint

PowerPoint 2010 added a new insert video feature that allows online YouTube videos to be added to presentations. I have not recommended this feature because it has the downside of needing to be online and also a high bandwidth connection to play the video. There are several easy ways to download and embed YouTube videos, which I would recommend to minimize playback issues.

But, the request comes up often enough on how to use it, so here is a step-by-step tutorial.

1. Find video you want to insert onto slide.

2. Click the “Share” button under the playback bar.

3. Check the “Use old embed code” box. (Uncheck the “Show suggested videos when video finishes” if you want just a black screen when playback is done.) Copy the code.

4. In PPT, go to the Insert tab, and under Media, click the carrot down on the Video button.

5. Select the “Video from Web Site” option.

6. Paste the code into the text box. Hit Insert.

7. You now have the YouTube video on your slide.

Note: As mentioned above, the computer must be connected to the internet for the video to play.

– Troy @ TLC

By |2016-08-16T09:03:02-07:00October 15th, 2012|Tutorial|

YouTube Downloader HD – also for audio files!

Videos are great in presentations (when used properly). Audio is also a great element to add to presentations (again, when used properly). YouTube is a great resource for audio as well as video – for example, search “applause sound effect” or “applause sfx” and there are hundreds of audio files that could be used in a presentation.

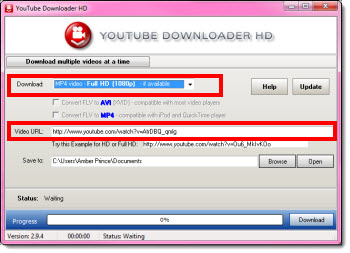
YouTube Downloader HD is free software that also allows any YouTube video to be downloaded as an MP3 audio.

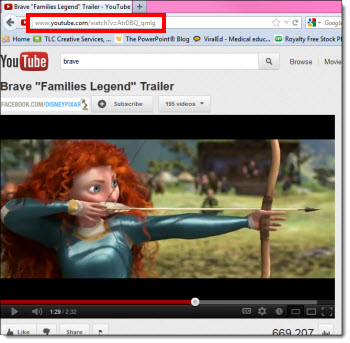
Downloading audio files is easy. Go to the video on YouTube. Copy the URL address of the video.

Open the YouTube to MP3 software, and paste the video’s address into the Video URL field.

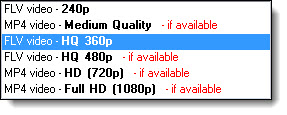
In the audio settings dropdown, select the quality of the sound.

Click download.

Now insert the downloaded .mp3 into PowerPoint and set the animation as needed (Note: PPT 2010 and above can embed .mp3 format).

– Troy @ TLC

By |2016-08-16T09:04:55-07:00October 5th, 2012|Tutorial|
Go to Top