powerpoint

Use Background Fill For Great Graphic Elements

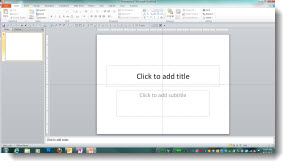
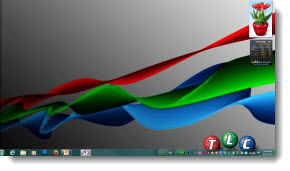
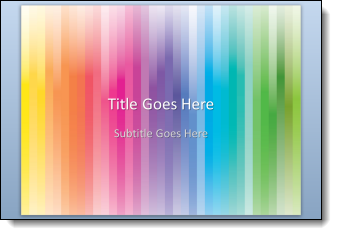
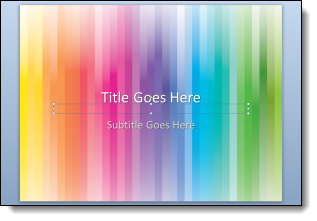
I have used this technique on some recent projects that we designed dynamic background art for. The idea uses a simple feature that is used little and creates really dynamic graphic elements that are amazingly easy to use. Here is my sample slide with a dynamic background (thanks to Amber for creating this sample slide and tutorial images).

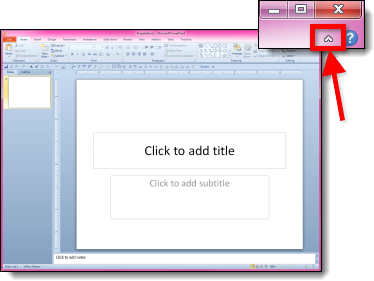
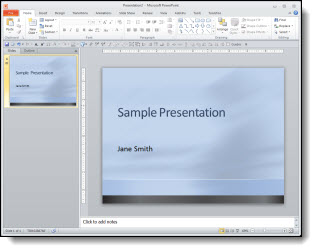
1. Add a PPT shape of your choice, I am using a standard rectangle. Set it as the background (FORMAT >> BACKGROUND >> PICTURE).

2. Set the PPT shape to “No outline,” solid color fill and no styling.

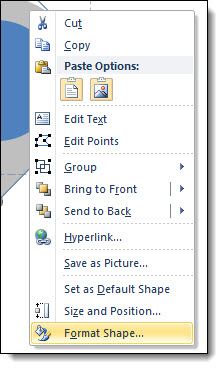
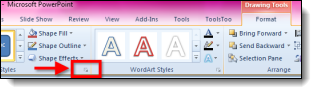
3. With the shape selected, go to FORMAT >> open the shape options by clicking the small icon in lower right >> under FILL >> SLIDE BACKGROUND FILL (last option).

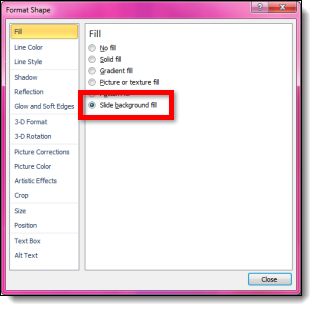
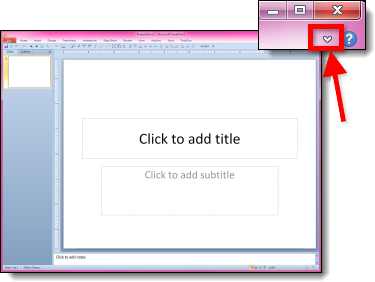
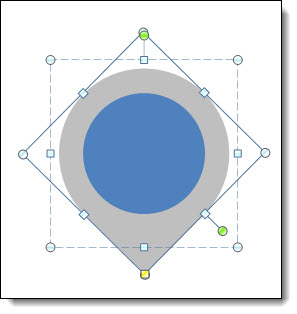
4. NOTE: The shape has now disappeared with only the shape selection lines visible.

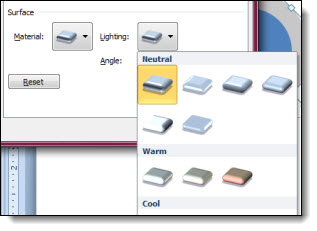
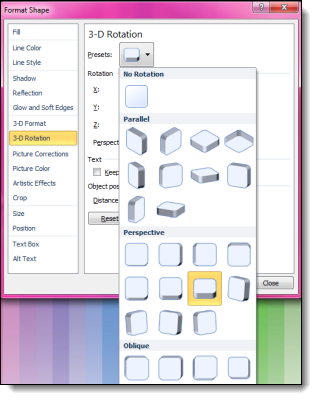
5. What you do here determines the look you create. I am using 3D perspective and some styling options. Select the shape.
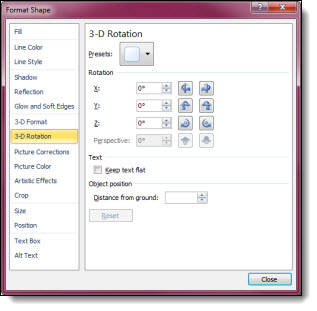
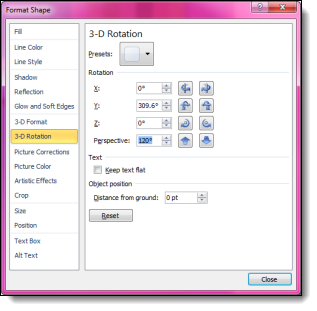
– Add 3D Rotation (we are starting the “Perspective Relaxed” preset).

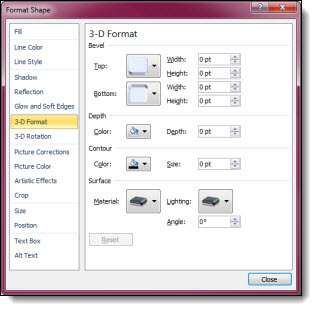
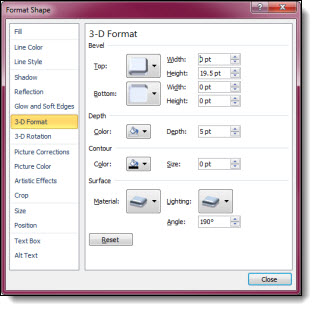
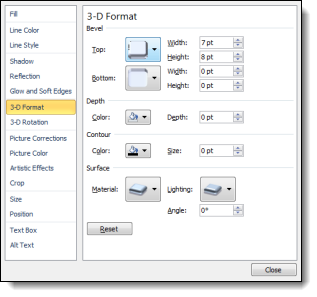
– Add a 3D Format for a bevel effect (Circle bevel with the width at 7pt and height at 8pt).

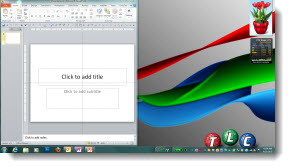
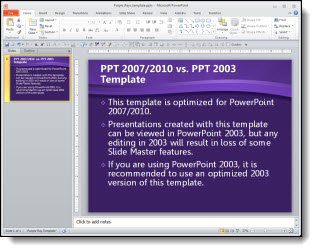
6. Now we see the interesting effect when the background fill is combined with some shape styling.

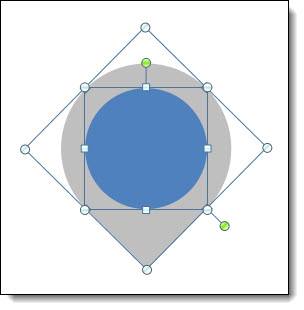
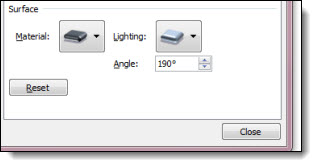
7. To really create a dynamic visual the next step is to select the shape and modify the 3-D Rotation perspective to 120 degrees.

8. With the new 3D formatting we can really see the effect of the background fill in the shape.

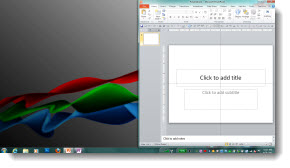
9. To create a full Title Slide layout, the shape was enlarged for more depth and stretched across the slide. Then duplicated, reduced in size and moved under the subtitle text box. The background fill automatically adjusts to the new placement on the background to create new looks for the same shape

Click here to download the sample slide.

– Troy @ TLC

By |2016-08-16T09:29:58-07:00March 20th, 2012|Tutorial|

Show/Hide the Ribbon in PPT 2010

The ribbon, introduced in Office 2007, is a compact layout. But there are times when having a bit larger work area is helpful. For those times, starting with PPT 2010, the ribbon can be hidden to increase the work area.

Here is the standard edit view with the ribbon. In the upper right corner is a small up/down icon:

Click the up/down icon and it hides or shows the ribbon:

– Troy @ TLC

By |2016-08-16T09:30:26-07:00March 18th, 2012|Tutorial|

Using Windows 7 Keyboard Shortcuts to Move A Presentation

Windows 7 is installed on all computers here at TLC Creative Services for good reason – it is the best operating system Microsoft has released. If you are not familiar with moving and arranging application windows using keyboard shortcuts in Windows 7, it is a great feature!

Here is my desktop with PowerPoint open as a small application window:

If I used the Windows Key + Up arrow

PowerPoint maximizes to full screen:

Use the Windows key + Left arrow to snap PowerPoint to the left side:

Use the Windows key + Right arrow to snap PowerPoint to the right side:

And use the Windows key + Down arrow to minimize PowerPoint:

Plus, if you have multiple monitors this also moves the application to the other monitors! Use Window Key + Left/Right arrow to “step” the application across the screens. Or use Window key + Shift + Left/Right arrow to quickly move the application to the other monitor keeping the same size and position when it moves.

Give it a try, I am certain this is a Windows 7 feature you will make a part of your daily design routine like I have.

– Troy @ TLC

By |2016-08-16T09:37:57-07:00January 17th, 2012|Tutorial|

Theme or Source – Your Choice

When moving slides from one presentation to another, the slide formatting (based on the master slides) is your choice – if you use the Paste Dialog.

1. From any presentation, copy the slides either in the left pane or slide sorter.

2. Go to the presentation where the slides are to be added and paste them in.

3. To paste, click where new slides are to be added and right-click. From the pop-up dialog, under “Paste Options” select “Use Destination Theme.”

4. The pasted slides will take on the formatting from the master slide set in the presentation:

5. Or you can choose “Keep Source Formatting:”

6. With “Source Formatting” the new slides retain their orginal master slide and formatting:

The choice is yours!

– Troy @ TLC

By |2016-08-16T09:39:54-07:00January 8th, 2012|Tutorial|

Creating the % Number Gradient Style

Here is the example slide from the previous post (download link below).

Here is a quick how-to on creating the custom text style. The “regular” text is Arial, 24 pt, bolded. The stylized text is Arial Black, 125 pt, bolded, drop-shadow, outline and gradient fill (so think BIG)

To create the gradient fill:
1. Type = Linear (= one direction)
2. Angle = 90 degree (= top to bottom)
3. Gradient Stop 1 = white, position 28%, transparency 05 (solid)
4. Gradient Stop 2 = bright cyan, position 46%, transparency 05 (solid)
5. Gradient Stop 3 = muted blue, position 48% (very close to the other blue), transparency 05 (solid)
6. Gradient Stop 4 = white, position 75%, transparency 05 (solid)

To see this gradient in PowerPoint (2010 is my recommendation for gradients (over 2007)), download here. (43K)

– Troy @ TLC

By |2016-08-16T09:40:12-07:00January 5th, 2012|Tutorial|

Really Nice 3D Icons Created in PPT

Here is the end result:

This great 3D icon was developed entirely in PowerPoint 2010. Using standard shapes, 3D Perspective and the Shape Combine tools.

Here are steps to create:

1. Insert the tear drop shape from the shape menu.

2. Rotate the shape until the point is pointing down.

3. Change the color to a gray, and remove the outline.

4. Insert an oval shape, holding down shift to make it a perfect circle. Holding ctrl, it will expand from the center and place in middle of the tear drop shape.

5. Remove the outline from the circle, if there is one.

6. Select both shapes and group.

7. For the 3D rotation, we will need the group selected.

8. Select “off axis 2 left.”

9. For the 3D effects, we only need the tear drop shape selected.

10. Height: 19.5 pt, width 0 pt, depth 5 pt, material special effect >> soft edge, lighting >> three point, angle 190.

11. Now you have a 3D tear drop shape.

By |2016-08-16T09:42:00-07:00December 13th, 2011|Tutorial|

Change Font Size with Keyboard Combinations

There is a lot of mouse movement when designing slides in PowerPoint (and while I really like the ribbon layout, I feel there is more mouse movement now than in the legacy toolbar interface). Adjusting font size is a common design need and can easily be done with keyboard commands.

To increase a font size:

To decrease a font size:

– Troy @ TLC

By |2016-08-16T09:47:47-07:00October 26th, 2011|Tutorial|

How Long Can An Animation Be?

So how long of an animation can be added to something in PowerPoint? Not what is practical, but what is possible.

The answer is 59 minutes, 59 seconds and 99 thousands of a second. But how you set this up depends on the version of PowerPoint you are using.

PPT 2003 and 2007:
1. Add any animation (Entrance, Exit, Emphasis, Motion Path) to element.

2. Open the animation settings dialog and input 59.

3. “59” defaults to 59 seconds.

4. Open the animation settings dialog and input 59:00.

5. Now the animation will occur over the next 59 minutes.

PPT 2010:
With PPT 2010 there were many tweaks to the animation UI, not all for the better…

1. Add any animation (Entrance, Exit, Emphasis, Motion Path) to element.

2. Open the animation settings dialog and input 59.

3. “59” defaults to 59 seconds.

4. Open the animation settings dialog and input 59:00. Click “Okay” and the time is highlighted waiting for a valid value to be entered (no hint that 59:00 is not valid or what is valid, you just get no action when you click the Okay button).

5. Open the animation pane and select the same element. It is a bit tedious, but click and drag the timeline as long as you want the animation to occur. Note: You can drag the timeline as far past 1 hour as desired.

6. Even though you extended the timeline to 1 hour, 1 minute or 5 hours, it will snap back to its maximum 59:59:99.

– Troy @ TLC

By |2016-08-16T09:49:13-07:00October 19th, 2011|Tutorial|

Custom Gradient Fill for Big Numbers

For this slide (see previous post for more info on it), I wanted the numbers to be a visual focal point. I also wanted to keep them as editable PPT text. By mixing the stylized text with more standard text, a nice slide layout was developed. The big number text was created by:

1. Make it big (this text is 125pt).

2. Give it a gradient fill – using colors that coordinate with the template color scheme.

3. Add a subtle outline (stroke) to the text to help it contrast for legibility.

4. Add a drop shadow.

The sample slide can be downloaded here.

– Troy @ TLC

By |2016-08-16T09:51:16-07:00October 7th, 2011|Personal, Portfolio, Templates/Assets|

Big Numbers Are the Key Concept

One of the greatest things I hear is something like this “Just make the slides have the key concepts I am talking about.” To me, that means the presenter:
– Knows their talk
– Is a confident presenter
– Will not be reading the slide to the audience
– And has given me freedom to design visual slides (yeah!)

This is a sample slide from a recent presentation TLC Creative Services developed (Note: Corporate template and much of the content adjusted for the sample slide). This minimal content slide reinforced the presenters point, did not distract the audience from the presenter and provided much more memorable speaker support than a list of bulleted text with all the details (that the presenter provided during the talk).

– Troy @ TLC

By |2016-08-16T09:51:45-07:00October 5th, 2011|Personal, Portfolio|
Go to Top