#11 – Remove Background Tool
I spend a lot of time in Photoshop preping images for presentations. But I may be able to spend a bit more time in PowerPoint thanks to this new tool. Tucker, one of the Microsoft developers described the way this really great new tool works is the “magic coding”. That’s a good enough description for me as it actually works better than Photoshop’s ‘magic wand’ tool.
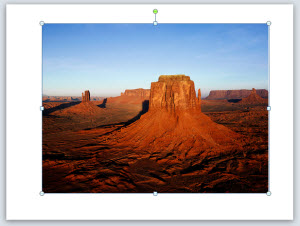
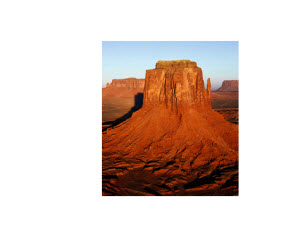
1. Insert an image you want to remove the background on – typically I would open the file in PhotoShop, drop out the background, save the image as a .png with transparency, and then insert into PowerPoint. Here the image looks great, but I want the template background to show through, which is not white.

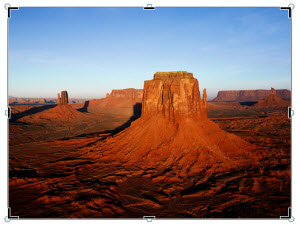
2. With image selected go to the format(tab) >> Background Removal Tool

3. The tool takes it guess at what is not wanted (purple mask)

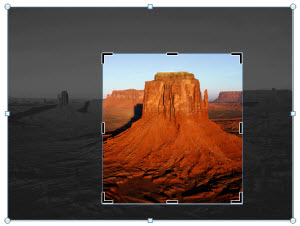
4. Modify the selection with the + and – tools
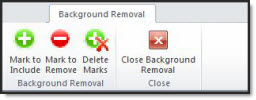
5. Here is the image with all of the include image(+) and remove image(-) markers.
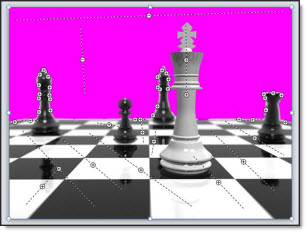
6. End up with a great image that allows the background to show!

The effect is not permanent, the background can be further modified at any time. The background remeval can be reset back to the original image too.
– Troy @ TLC


 Video is converted to low-res .gif “movie”. Note on the PAN transitions the background stays in place while the content moves/transitions!