powerpoint

3D Model On-Slide Turntable Animation

Here is a demo of the new 3D Model TURNTABLE animation created by Christie on the TLC Creative design team. The Turntable animation adds a 3D rotation, of a 3D model, that can be once, twice or endless as an on-slide emphasis animation.

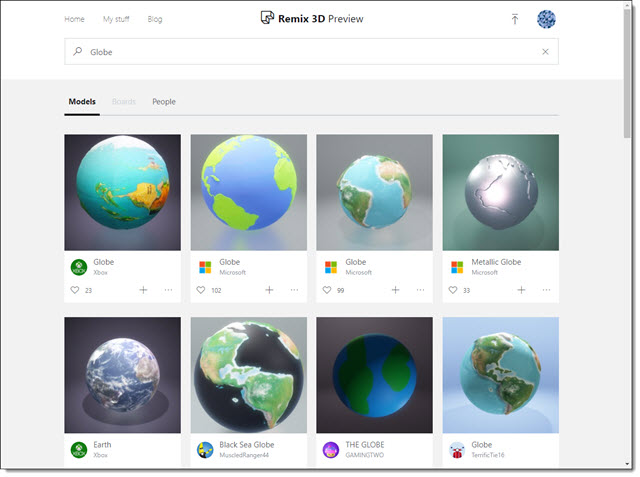
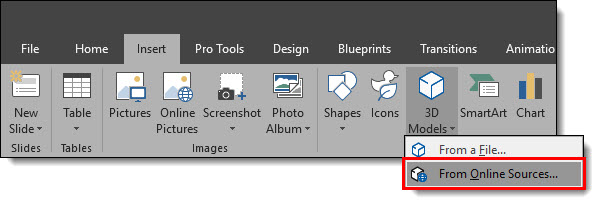
For this demo the Microsoft logo 3D model logo was sourced from Remix 3D.

There are only 2 slides in the demo presentation, each for a specific task.

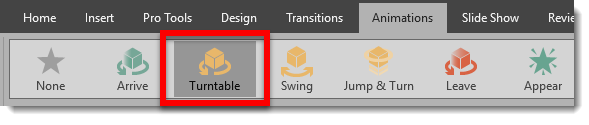
Slide 1 has the TURNTABLE 3D model only animation applied, with a rotation RIGHT and set to continue until end of slide. 

[KGVID]https://thepowerpointblog.com/wp-content/uploads/2018/01/unnamed-file-4.mp4[/KGVID]

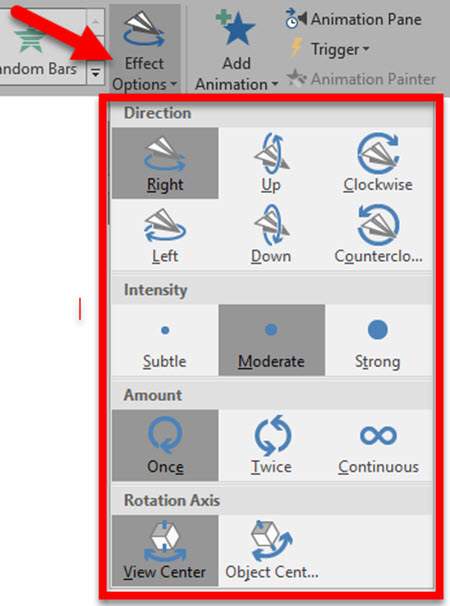
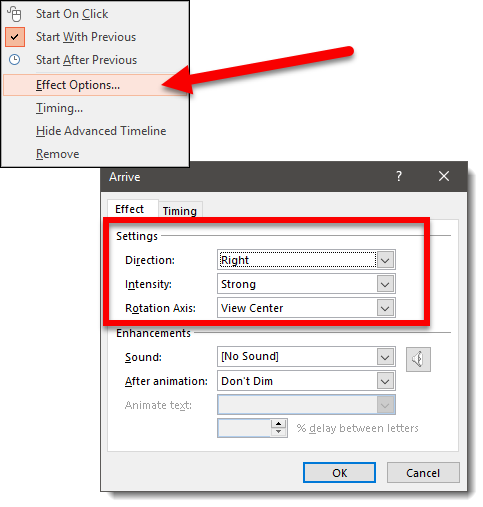
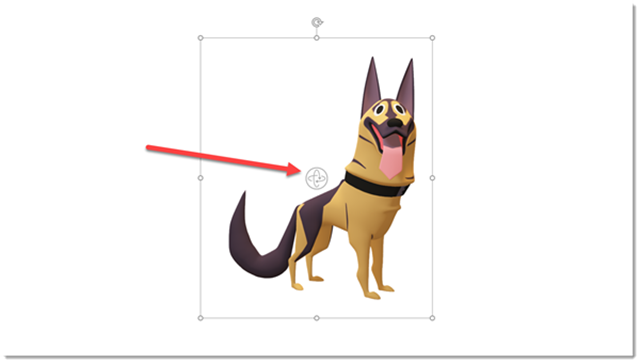
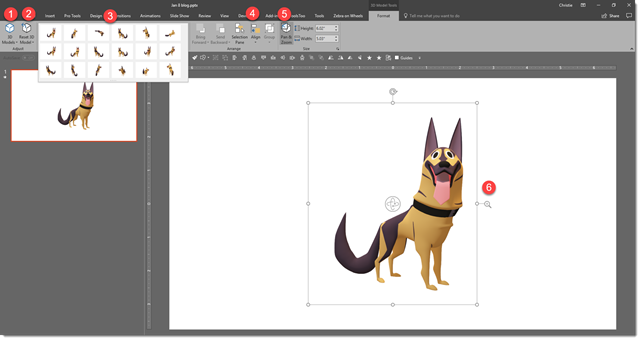
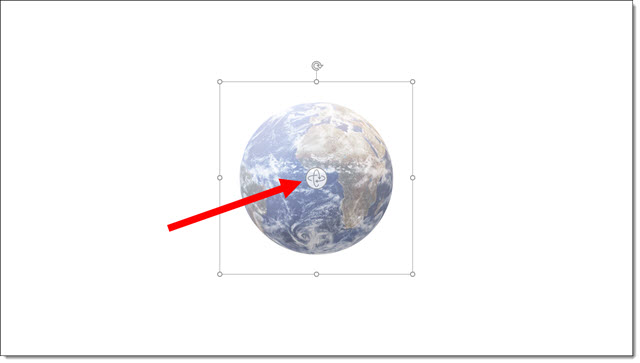
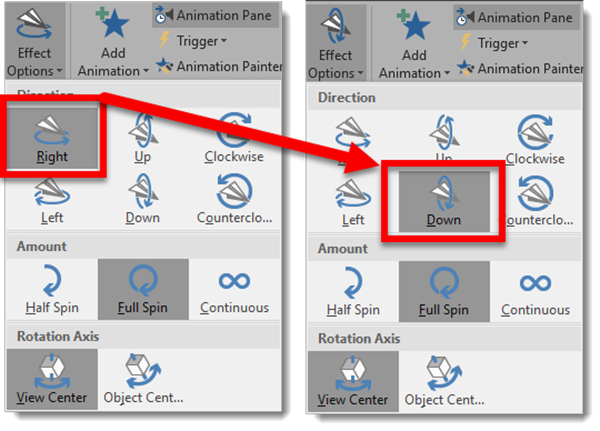
Each 3D Model animation has a number of options. As example, changing the DIRECTION from the original RIGHT to DOWN. To change the effects of the animations, select the 3D model, click the Effects Options drop down, and the menu shows all available variations for direction, type of rotation and where the rotation axis is. 

Now the same slide animation looks like this

[KGVID]https://thepowerpointblog.com/wp-content/uploads/2018/01/unnamed-file-5.mp4[/KGVID]

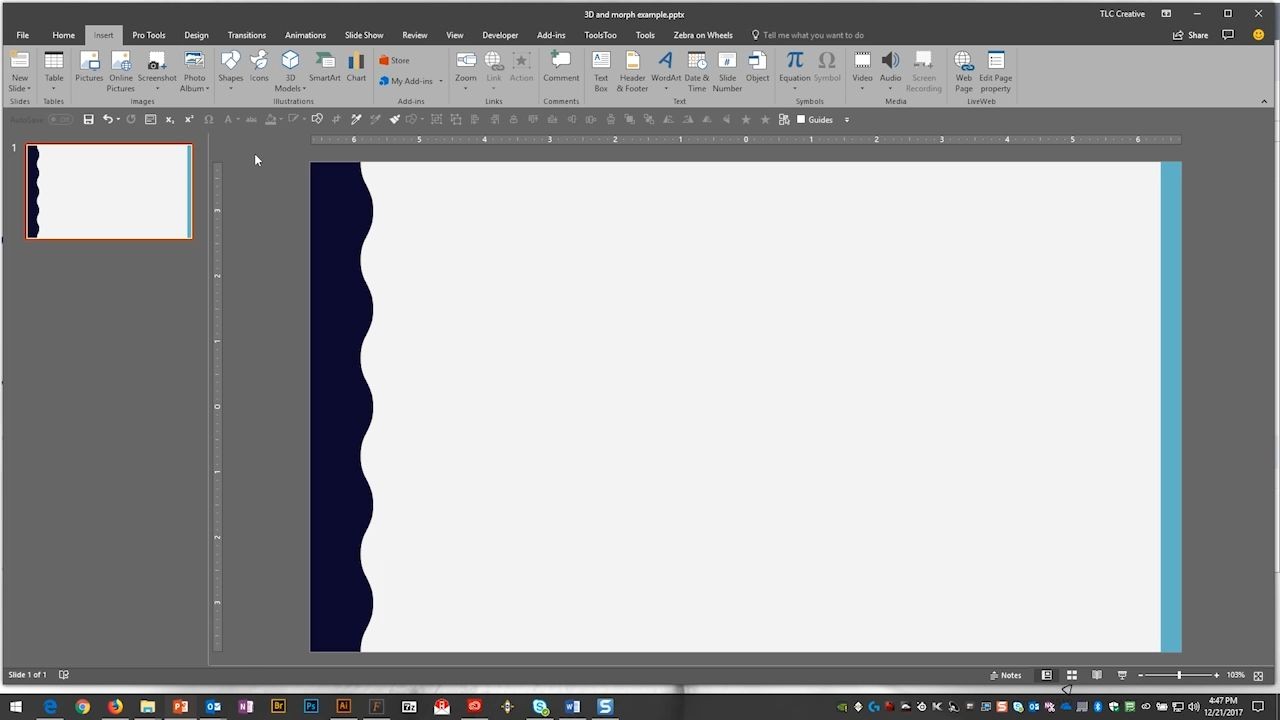
Slide 2 is how this could be used in a real-world presentation. With slide 1 the logo has a never-ending rotation continue while the presenter introduces the topic. Then with a click to advance to slide 2, a morph transition to seamlessly moves and shrinks the logo to the right side of the screen while presentation content (the bullet list text) enters. And then for fun we used another new 3D model only animation, Jump & Turn, on the Microsoft logo in its new position.

[KGVID]https://thepowerpointblog.com/wp-content/uploads/2018/01/unnamed-file-6.mp4[/KGVID]

Troy @ TLC

By |2019-10-30T06:07:02-07:00January 26th, 2018|PowerPoint, Tutorial|

On-Slide 3D Model Animation!

There are 5 new animations in PowerPoint! All 5 are for 3D models only, and they provide on-slide animations (vs. using Morph to animate and see different views of a 3D model). I am hopeful that we will see additional new animations as support for 3D models continues to evolve in PowerPoint.

The new animations are found on the Animation tab.

Each animation has a number of Effect Options to adjust the animation action. One option is the click the Effect Options drop-down from the Animation Tab.

The other option is to view the Animation Pane and right-click the 3D model animation and select Effect Options to open the animation dialog.

And here are the 5 new 3D Model animations!


My personal hope is that the use of these animations will extend to be able to apply them to anything; photo, shape, text, icons, etc. But for now I am excited to finally see something new happening on the Animation tab!

Troy @ TLC

By |2018-01-11T11:32:30-08:00January 24th, 2018|Tutorial|

3D Model Maze Animation

Just experimenting with 3D models and how they can be animated in PowerPoint is exciting and fun for me, because it is new options, new rules, and new visuals. For fun I wanted to create a 3D Virtual Fly Through style animation. Things did not work how I originally intended (we are definitely limited when it comes to moving the camera view inside a 3D model in PowerPoint vs. other 3D specific software). Here is the 3D model of a maze sourced from Remix 3D.

The final presentation is 21 slides, all motion (except the first and last slides) accomplished with repositioning the 3D model, using the 3D View ball, 3D Pan & Zoom and Morph transition.

The final result is a simpler, but still amazing (pun intended!) motion graphic.

[KGVID]https://thepowerpointblog.com/wp-content/uploads/2018/01/unnamed-file-3.mp4[/KGVID]

Troy @ TLC

By |2019-10-30T06:05:37-07:00January 22nd, 2018|PowerPoint|

3D Model Education Stats Animation

Amber on the TLC Creative design team created this fun presentation example that uses 3D Models as art elements on almost every slide, and makes use of the new on-slide 3D Model animations. The presentation is 16×9, PowerPoint 2016 Office 365 with 3D Model support.


Design notes:

  • Slide 2: applied the turntable animation to the 3D model of the globe. Layered animations to maintain a seamless spin of the globe (typical presentation we would divide this content across 2 slides to make it easier to review as a PDF or printout)
  • Slide 3: added the building 3D Model and used the new on-slide 3D model animations for both; exit for the globe and entrance for the building + entrance animations for the text
  • Slide 4: Another 3D model with entrance animation and PowerPoint text
  • Slide 5: lots of 3D model animation, just because we can now!
  • Slide 6: all animation accomplished with a Morph transition

3D models are not always small file sizes. This presentation has not video, but it is 60 MB! The editable PowerPoint file can be downloaded here.

Troy @ TLC

By |2018-01-11T12:15:24-08:00January 18th, 2018|PowerPoint|

Animate 3D Models Using Morph

Combining the Morph transition with 3D models is easy, and can create amazing visuals and motion animation!
Insert a 3D model on a slide. Position and rotate. Then duplicate the 3D model to the next slide, adjust position, size and rotation with a morph transition. Watch the results!

[KGVID]https://thepowerpointblog.com/wp-content/uploads/2018/01/unnamed-file-10.mp4[/KGVID]

Make it a slow and long animation with a slow morph transition!

[KGVID]https://thepowerpointblog.com/wp-content/uploads/2018/01/unnamed-file-1.mp4[/KGVID]

Or very fast with a faster morph transition

[KGVID]https://thepowerpointblog.com/wp-content/uploads/2018/01/unnamed-file-9.mp4[/KGVID]

We can use the Pan and Zoom as part of our morph animation!

[KGVID]https://thepowerpointblog.com/wp-content/uploads/2018/01/unnamed-file-8.mp4[/KGVID]

TIP: 3D models can have any standard animation applied (motion paths, grow/shrink, fade in/out, etc.). IF it has an emphasis animation, the morph transition will continue to work. If it has an entrance or exit animation, the morph transition will apply to that model because it cannot have 2 entrance or exit effects (eg. morph entrance and fade in animation entrance).

Troy @ TLC

By |2019-10-31T22:04:25-07:00January 12th, 2018|Tutorial|

Moving and Formatting 3D Models in PPT

The 3D models in PowerPoint are vector art, so they can be resized from very small to very large with no quality loss (just like PowerPoint shapes, text, .emf or .svg image). 3D models when selected have the standard resize and rotate action points, AND a new 3D rotation icon in the center.

3D Models in PPT

3D models are like a real physical model. They can be viewed from all sides – including from the top or from underneath. Using the new 3D rotation icon a 3D model can be rotated to any angle and view.

[KGVID]https://thepowerpointblog.com/wp-content/uploads/2017/12/unnamed-file-1.mp4[/KGVID]

The PowerPoint ribbon has a new tab just for 3D models. Select a 3D model on a slide and to go 3D MODEL TOOLS. Here are some of the new, and very useful options: 

3D Models in PPT

1. “3D Models” is the same as the option on the Insert tab to add new 3D models to a slide (so don’t get confused, it is typical Microsoft Office – multiple ways to do the same thing).

2. “Reset 3D Model” works the same as resetting photos version. Click the button and the model goes back to original view but keeps any resizing or repositioning. Click the down arrow and use RESET MODEL AND SIZE to go back to original inserted view and size.

3. Preset model angles/views. 18 preset views. These are fast to get close to the needed angle, or are great is setting the view of multiple models to all be from same vantage point.

4. The Z order and align buttons are the same tools as found on other tabs (TLC Creative has each of these on our custom QAT).

5. The Pan & Zoom. This one is important. It adds another icon to the selected 3D model.

The Pan & Zoom icon “zooms” in or out the 3D model inside its bounding box and also moves the 3D model within its bounding box.

To use, click and hold on the magnifier icon, then move up to zoom in/enlarge or move down to zoom out/shrink. This is different from resizing the 3D model shape because zooming in can make the 3D model too large to fit it bounding box and automatically crops it to the placeholder shape.

The Pan part of the Pan & Zoom tool is moving the 3D model within the placeholder. For example, if we click and drag a 3D model, the placeholder moves position. If we click the Pan & Zoom tool on the ribbon, then click the magnifier icon, then click and drag the 3D model and the model moves inside the placeholder while the placeholder stays in the same position.

[KGVID]https://thepowerpointblog.com/wp-content/uploads/2017/12/unnamed-file.mp4[/KGVID]

Troy @ TLC

By |2019-10-28T10:02:00-07:00January 8th, 2018|Tutorial|

Microsoft Remix3D for 3D Models

Microsoft is making a big push into 3D and is supporting all users with some new tools. Remix 3D is a Microsoft offering, and uniquely the site has minimal Microsoft branding, and can be used by anyone.

Remix3D has a wide variety of 3D models (and by “wide variety” I mean cheesy cartoon quality to more professional subject matter). Everything on Remix3D is FREE and completely royalty free!

PowerPoint has very recently added the ability to add real 3D models to slides. Here at TLC Creative we feel having support for 3D models in presentations is going to add a great layer of visual styling options! Previously adding a 3D model meant exporting a .png image or movie file of the model. Now we can add the real 3D model, maintaining its 3D attributes.

To use any of the Remix3D.com models in PowerPoint (or Word, or Excel) you can either go direct to the website, login (a Microsoft account is needed, not necessarily your Office365 email), download and insert onto a slide. As example, searching for “Globe” there is a good selection of models to choose from.


The other option is to search and insert directly in PowerPoint. Remix3D works seamlessly with all Office apps (PowerPoint, Word, Excel), including the new Microsoft Paint 3D application. The integration is impressive. Using Office 365 PowerPoint go to INSERT > 3D MODELS > FROM ONLINE SOURCES.

The dialog that opens is a view of Remix3D’s library. Search and find a 3D model and click insert. Here is a search for “Globe” in the PowerPoint direct dialog. All the same models. Find the 3D model you want and click INSERT.

Two notes: 

  1. The background behind the 3D model is not going to be inserted, just the model over the slide background.
  2. When searching through the website, you can interact with the 3D models to rotated on all axis’ to view. But the PowerPoint direct dialog is only a static image of the 3D model.


The selected 3D model is placed on the current slide, centered on the slide. 3D models are vector act, so they can be scaled to any size with no quality loss. In addition, 3D models has a new center activation icon that allows it to rotate, zoom and pan the model to the desired view for the presentation. 

Throughout this month we are highlighting using 3D models in presentations with the TLC Creative design team’s PowerPoint demos that integrate 3D models.

Troy @ TLC

By |2018-01-06T23:30:23-08:00January 4th, 2018|Software/Add-Ins|

Christmas Animation Using 3D Model

Just having some holiday fun here at TLC Creative. Christie, on the TLC Creative design team, created this fun Christmas Animation using 3D (the Gingerbread house), holiday background image and PowerPoint text & graphics.

[KGVID]https://thepowerpointblog.com/wp-content/uploads/2017/12/unnamed-file-2.mp4[/KGVID]

Using only Morph transitions for the motion, this animation was accomplished in just 7 slides.

Christmas Animation Using 3D

Throughout January, The PowerPoint Blog is showcasing all 3D model use in PowerPoint.

Troy @ TLC

By |2019-10-28T15:27:37-07:00December 29th, 2017|Portfolio, PowerPoint|

Want A Perfect PowerPoint Circle, Square, Triangle?

Perfect shape 1

Sometimes just knowing a hack can save a lot of time. So this is one of those tips included in our TLC Creative PowerPoint training programs where someone always exclaims “Really!!” The tip is how to immediately add a perfect shape (same on all sides), ie. a circle, square or triangle. The solution is so simple, there is nothing complex to forget. Ready,

Click the desired shape in the shapes gallery

Perfect shape 2

Click on the slide. Note: just a simple click, no click and drag, no modifier keys, nothing, just click on the slide.

Perfect shape 3

Done! A perfect, equal sided, square, circle, triangle, etc. is added to the slide


And the shortcut to the shortcut!

Hold down the CTRL key and click on desired shape in the shapes gallery

Perfect shape 5

Perfect symmetrical shape is automatically added to the slide!

Perfect shape 6

Troy @ TLC

By |2017-10-20T07:34:14-07:00December 12th, 2017|PowerPoint, Resource/Misc|
Go to Top